Managing Self-contained Tenants
This topic covers Sisense self-contained tenancy from both the main tenant and organization tenant perspectives.
Main Tenant
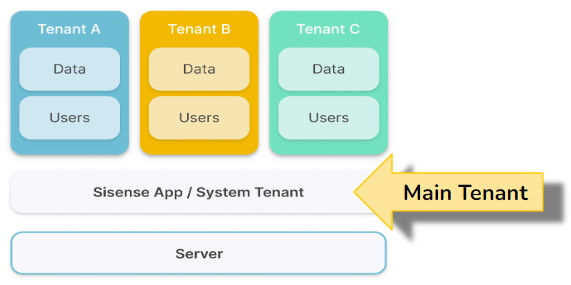
The main (default) tenant is part of the original Sisense application installation.
It can create organization tenants, as well as administer the base configuration of the deployment, (which is shared with the organization tenants). The main tenant has visibility of all the users in the system, including the users in the organization tenants.
Organization Tenants
Organization tenants (or, just “tenants”) are created by the admins of the main tenant.
The Tenant Admin of each organization tenant is responsible for user management, as well as managing the tenant SSO and tenant white labeling configurations.
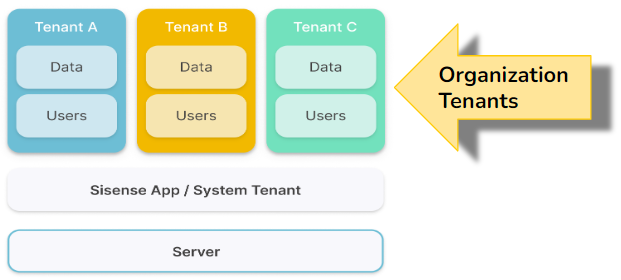
Most of the main tenant configurations and add-ons are inherited by its tenants. When add-ins are installed on the main tenant, they are available to all of the organization tenants. However, the organization tenants cannot manage add-ons. See the Sisense Marketplace for information about the Sisense add-ons.
General configurations, such as the start of the fiscal calendar and the default language also apply to all of the tenants. When functionality like Pulse is enabled on the main tenant, this will also enable it for all of the organization tenants.
Note:
The following functionality is available in the main tenant, but is not yet supported for organization tenants:
-
User parameters
-
Git integration
-
Web access tokens (WAT)
-
Look and feel
-
Active Directory
-
Custom code
To create a new tenant:
In the main tenant, on the Admin tab, under User Management, select the Tenants configuration option to open the Tenants configuration screen.
Click on the +Tenant button to create and configure the new tenant.
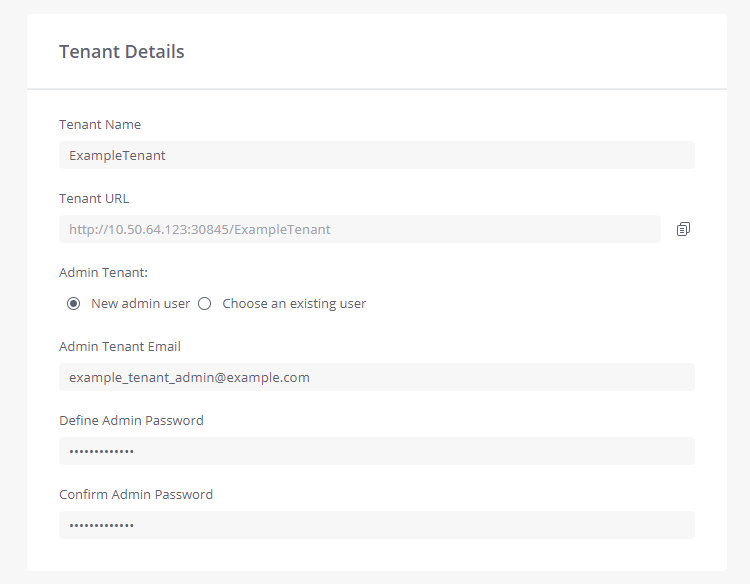
Tenant Details
-
Tenant Name - Enter the name of the new organization tenant you wish to create.
-
Tenant URL - The tenant URL is automatically created here based on the tenant name you entered. Click the copy button to the right to copy the tenant URL to your clipboard.
-
Admin Tenant - The tenant Admin can be an existing user or a new user. Enter the required information, including the Admin’s email address and a valid password.
Settings
-
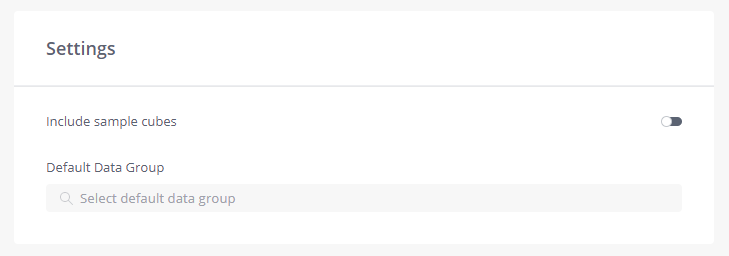
Include sample cubes - Toggle this switch on to include the Sisense example ElastiCubes in the new tenant.
-
Default Data Group - Select the default Data Group, or any Data Group that was defined for the main tenant, (see Creating Data Groups). The Data Group you select here will be the default Data Group for the ElastiCubes running on this tenant.
Note:
Data Groups are only relevant for tenants who will be using ElastiCube data models. See the Resource Management section in the topic Self-contained Multitenancy for more information.
License Allocation
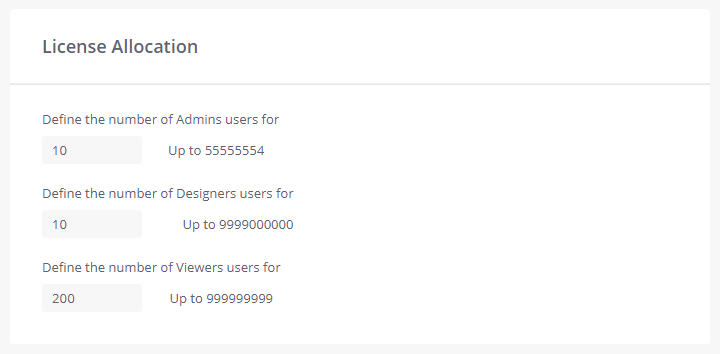
These settings limit the number of users the tenant Admin can allocate to each role on the tenant.
Enter the allocated maximum number of licenses for each of the following types of users:
-
Define the number of Admin users - The number of Admin users to allocate to this tenant.
-
Define the number of Designer users - The number of Designer users to allocate to this tenant.
-
Define the number of Viewer users - The number of Viewer users to allocate to this tenant.
Note:
Each admin user that is created, whether on the main tenant or an organization tenant, is counted as a separate license. This is true even if the admin users are for the same real user with the same email.
DNS Multitenancy Support
The DNS multitenancy support feature provides the ability to configure domain names for each tenant, which are parsed and translated into the correct tenant context, which remain for the lifetime of the request, and are used to retrieve the relevant assets for each tenant. The domain names are set via the POST and PATCH API calls of the "tenants" endpoint.
Your existing tenants can be viewed and managed in the Tenants window of the main tenant.
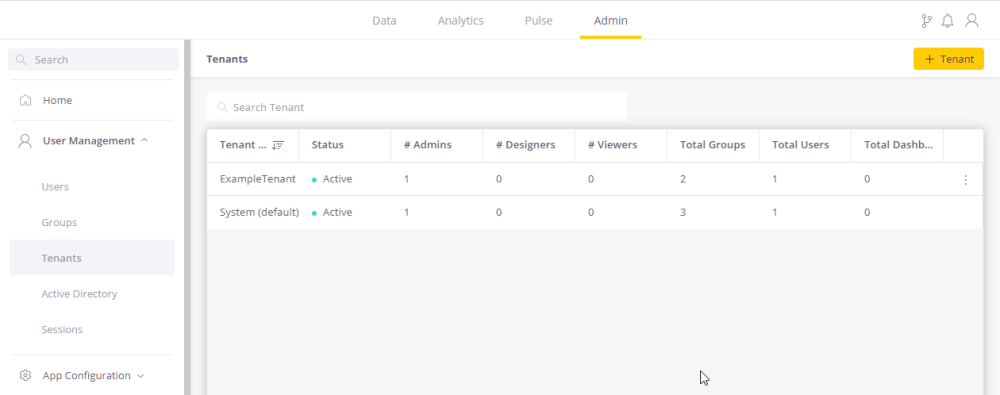
In addition to viewing important summary information about the organization tenants, you can also use the 3 dots menu to edit, deactivate (or activate inactive tenants) and delete the tenants:

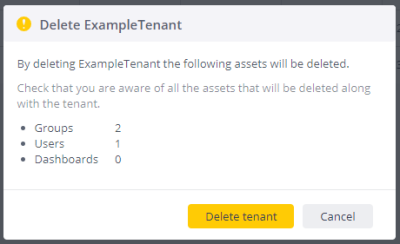
Selecting to delete a tenant opens a confirmation message with the number of groups, users and dashboards that will be affected, and requires you to confirm the deletion:
To log into your organization tenant, use the tenant URL that was generated during the tenant creation process. The tenant URL is composed of the IP address and the port of your server, followed by the tenant name.
For example, if your server IP address is 12.34.56.789, the port is 12345, and your tenant name is ExampleTenant, then the tenant URL would be: http://12.34.56.789:12345/ExampleTenant/
The tenant URL automatically redirects to the login URL, (which can also be used to login to the organization tenant): http://12.34.56.789:12345/ExampleTenant/app/account/login
Note:
The login process is the same for all users, regardless of their role.
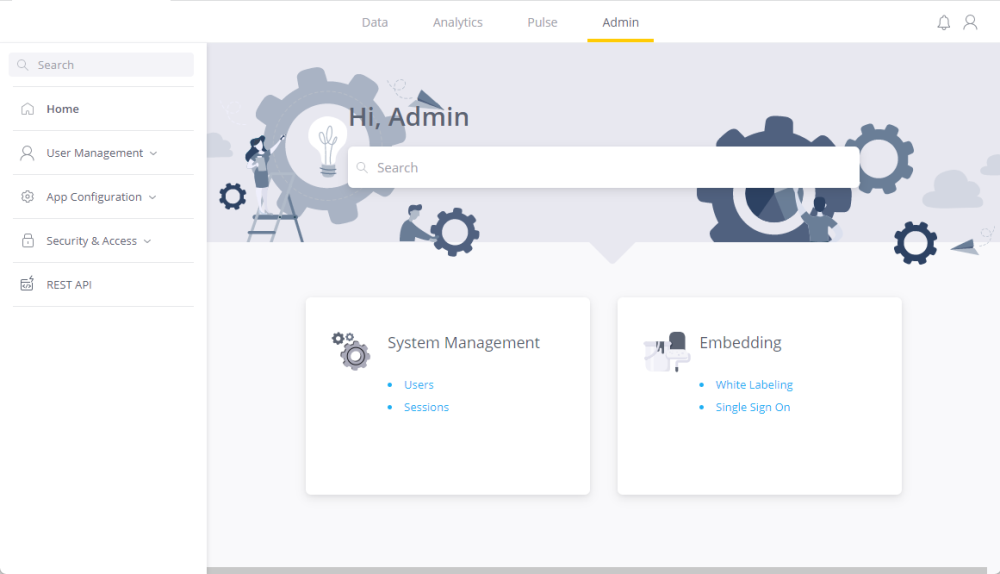
As the tenant admin of your organization tenant, you can use the Admin tab for managing the users, managing sessions, setting up your white labeling and configuring your single sign-on (SSO).
These options can be accessed using the links in the middle of the page, or the hierarchical menu on the left.
When File Management is enabled, the system admin (for the main tenant) and all tenant admins (for the organization tenants) can use it to manage files.
Enabling File Management
Only the system admin (for the main tenant) can enable File Management. As the system admin, go to the Admin tab, select App Configuration > Feature Management, and in the Management section toggle on File Management. Click Save.
To access File Management
Navigate to the Admin tab, expand App Configuration, and select File Management.
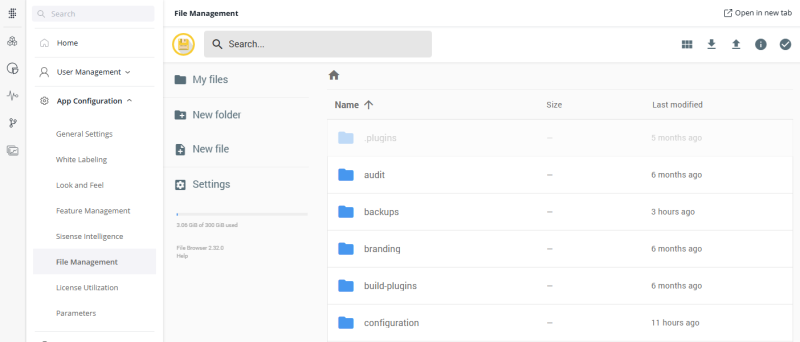
File Management for the System Admin
The system admin has visibility and access to the files of the main tenant and all of the organization tenants. For example, if a tenant creates an “addons” folder, (or any other folder) the system admin can browse to the tenant’s file area to view and manage the files:

File Management for Tenant Admins
Each tenant admin only has access to the files for their tenant. When a tenant admin uploads new files these files are fully isolated from other tenants (except for the system tenant).
Note:
Even when running custom code as a system admin, Notebooks have no access to other tenant folders.
See Uploading Files to Customize Your Linux Deployment for more information about using File Management.
The tenant admin of an organization tenant can manage its tenant users, (including adding new users and groups) and user sessions in the same way these are managed on the main tenant by its system admin.
For more information, see:
Single sign-on (SSO) enables a user to sign in once with a user ID and password to a group of related systems. SSO can be implemented on organization tenants using your in-house technology or by means of an identity provider.
Note:
When new organization tenants are first created they have the same SSO settings as the system tenant.
You can use the following protocols to integrate between the identity provider site (with SSO capability) and your tenant:
-
JWT - See SSO Using JWT for how to configure Sisense to use the JWT.
-
SAML - See SSO Using SAML 2.0 for how to configure Sisense to use SAML.
-
OpenID Connect (OIDC) - See SSO Using OpenID Connect for how to configure Sisense to use OIDC.
For more information see Single Sign-On (SSO).
The use of JWT (JSON Web Token) SSO for an organization tenant requires, on top of the default configuration, the inclusion of the organization tenant’s tenantId in the claim. (The tenantId property does not need to be added to the claim for the main tenant.)
See Developing the SSO Handler (in the SSO Using JWT topic) for a description of the default configuration.
Note:
It may be useful to maintain a mapping of users to their organization tenants. This can be used when defining a claim to ensure that the user (sub) belongs to the tenant (tenantId).
Adding tenantID to the JWT claim
To login to a organization tenant using JWT SSO, you must include the tenantId property in the claim:
{
  iat: Math.floor((new Date().getTime() / 1000)),
  sub: "test@sisense.com",
  firstName: "JWT",
  lastName: "User",
  groups: ["JWT_Group1", "JWT_Group2"],
  jti,
  // exp: ((new Date().getTime() - 180 * 60000 )/ 1000) // expires in 3 hours
  tenantId // The tenant ID - required for organization tenants
};
The provider handler can retrieve the tenantId value from the query params sent by the Sisense application, for example: request.url.query['sisenseTenantId'];
Redirecting to Sisense
When redirecting back to the Sisense application using the JWT, you can use the following methods:
-
Include the
tenantNamein the URL: https://test.sisense.com/{tenantName}/jwt?jwt=...
Authentication will fail if thetenantIdin the claim does not correspond to thetenantNamein the URL.
-
Add the tenantId as a query parameter:
-
https://test.sisense.com/jwt?jwt={JWT}&sisenseTenantId={tenantId}
Authentication will fail if thetenantIdin the claim is not the same as thetenantIdin the URL.
Not assigning a tenant context when redirecting back to the Sisense application will automatically take you to the main system tenant.
See SSO Using JWT for how to configure Sisense to use the JWT (JSON Web Token) authentication protocol.
Note:
When new tenants are first created they have the same white labeling settings as the system tenant.
White labeling for organization tenants works the same as for the main tenant. For detailed information about setting up white labeling for your tenant, see White Labeling Sisense.