Connecting to Oracle
Last updated: June 10, 2026
| Tier | Deployment |
|
|
|
This topic describes how to add data from Oracle to your data model using Introducing Live Models or an ElastiCube.
Sisense enables quick and easy access to databases and tables, and to views contained within Oracle databases.
Note:
The Oracle connector is not yet supported with the Analytical Engine.
To add data from Oracle to your data model:
- In the Data page, open a Live model, open an ElastiCube, or create a new ElastiCube.
For more information about Live models, see Creating Live Models and Adding Live Connections. -
In the Model Editor, click
 . The Choose Connector window is displayed.
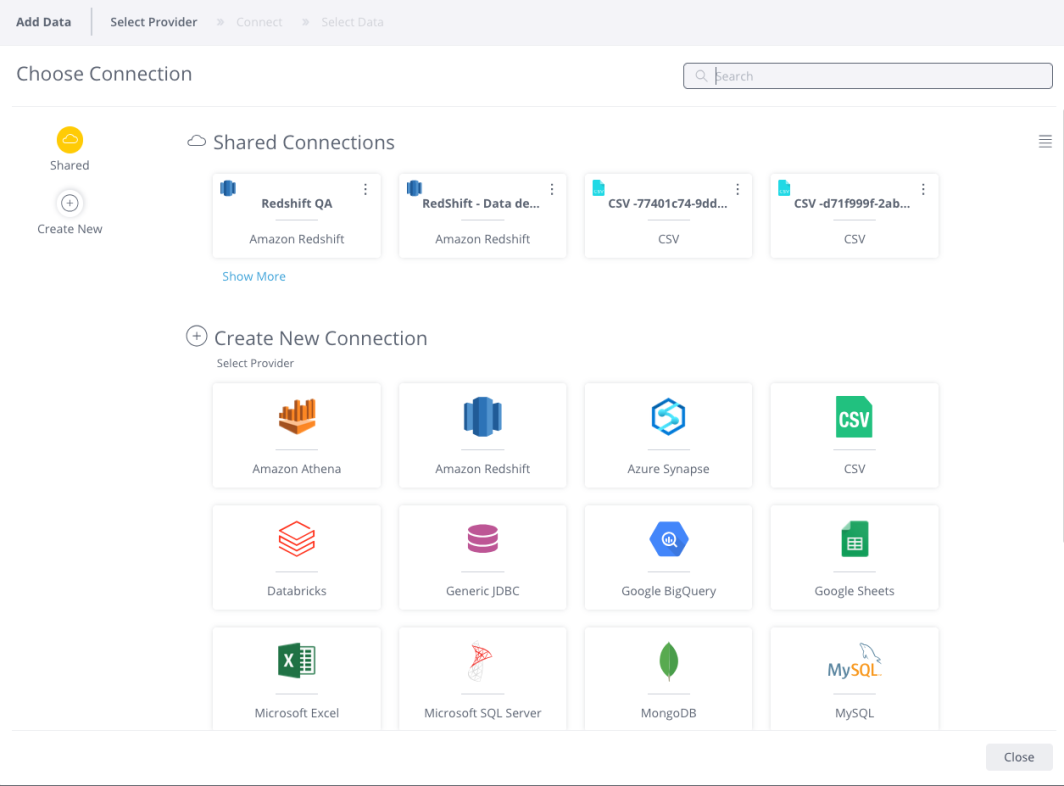
-
Choose an available managed connection, or create a new connection, for Oracle. The Oracle settings form opens.
-
Select your live Oracle data source:
-
From the Select connection type menu, depending on the information you have for your Oracle connection, select the relevant connection type.
-
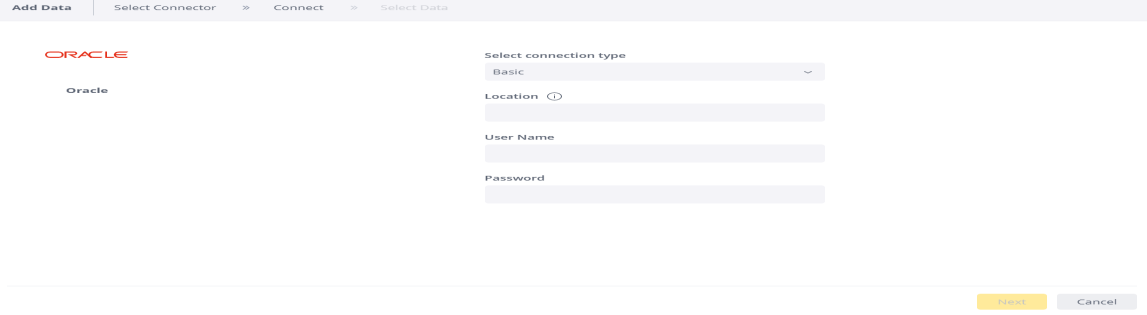
Basic
-
Location - Enter the address of the remote server to connect to, in the format host:port.
-
User Name - Enter the user name to connect to the database.
-
Password - Enter the user name's password to connect to the database.
-
-
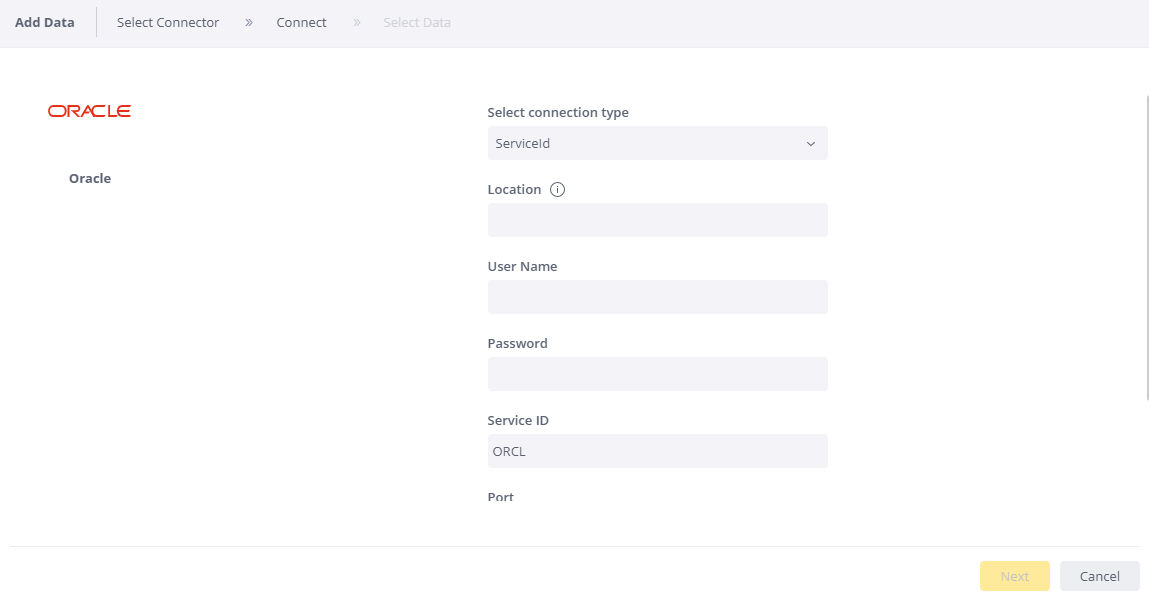
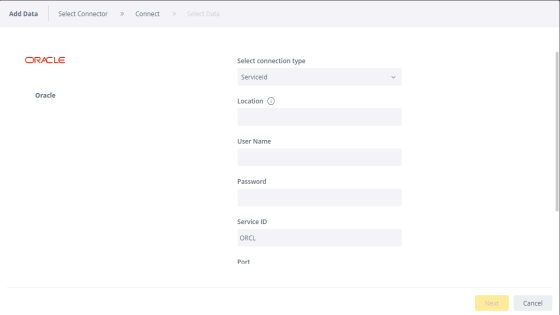
ServiceId
-
Location - Enter the address of the remote server to connect to, not including the port.
-
User Name - Enter the user name to connect to the database.
-
Password - Enter the user name's password to connect to the database.
-
Service ID and Port - Enter your Service ID. These can be found in the TNSNAmes.ora file. See: Service ID.
-
Additional Parameters (Optional) - Enter additional configuration options by appending key-value pairs to the connection string (for example, Schema=XXX;). For a full list of connection string options, click here.
-
-
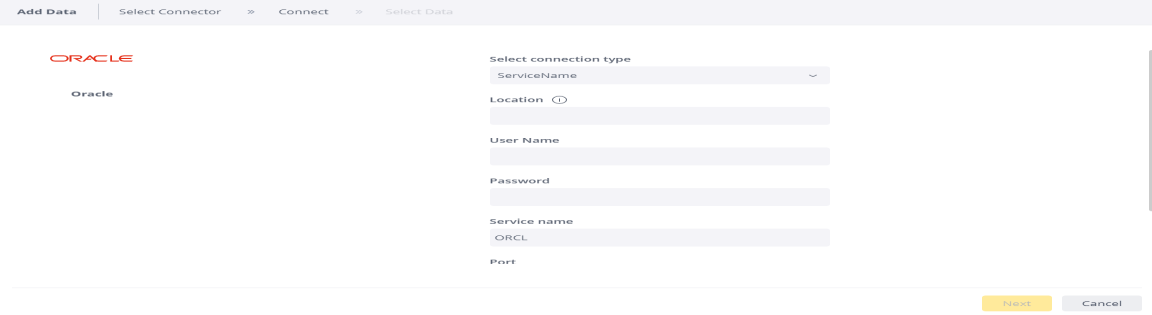
ServiceName
-
Location - Enter the address of the remote server to connect to, not including the port. Optionally, an Oracle connection string can be used:
(DESCRIPTION=(ADDRESS=(PROTOCOL=tcp)(HOST=your_ip)(PORT=your_port))(CONNECT_DATA=(SERVICE_NAME=$service_name)))replacing $your_ip, $your_port, and $service_name. These values can be found in the TNSNAmes.ora file. You can find a full description in Service ID.
-
User Name - Enter the user name to connect to the database.
-
Password - Enter the user name's password to connect to the database.
-
Service Name and Port - Enter your Service Name. These can be found in the TNSNAmes.ora file. See: Service Name.
-
Additional Parameters (Optional) - Enter additional configuration options by appending key-value pairs to the connection string (for example, Schema=XXX;). For a full list of connection string options, click [here].
-
-
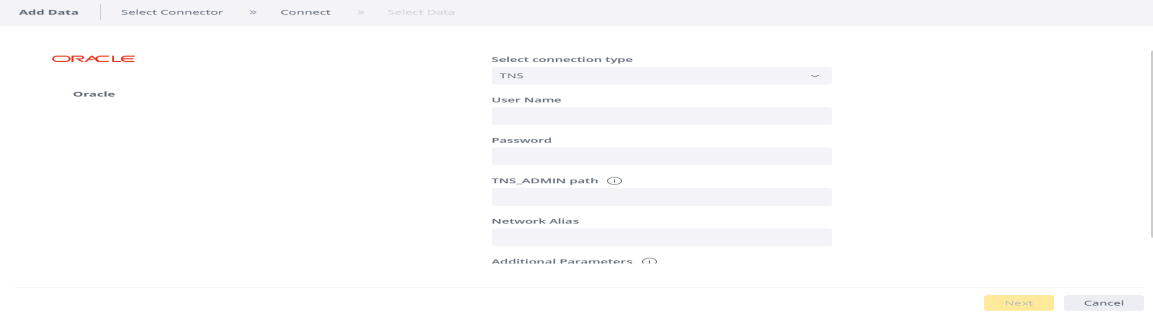
TNS
-
User Name and Password - Either use your Windows login details if they are configured with the database, or enter the username and password to connect to the database.
-
TNS_ADMIN path - Enter the full path of the .ora file.
-
Network Alias (Optional) - Enter the network alias, if there is one.
-
Additional Parameters (Optional) - Enter additional configuration options by appending key-value pairs to the connection string (for example, Schema=XXX;). For a full list of connection string options, click [here].
-
-
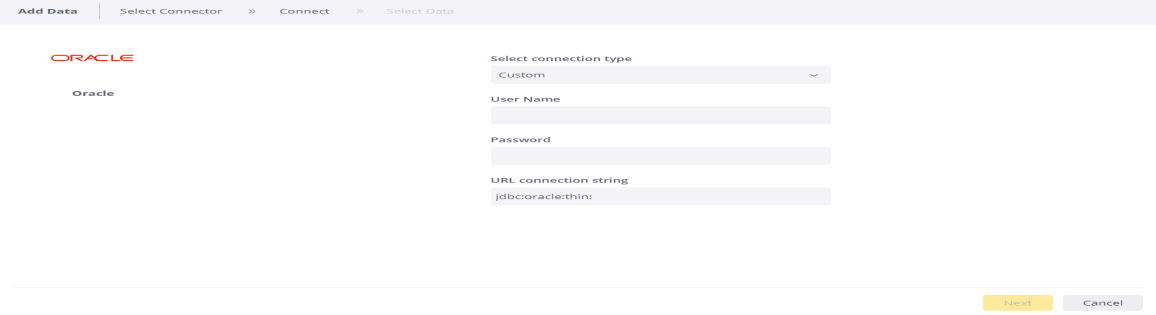
Custom
-
User Name and Password - Either use your Windows login details if they are configured with the database, or enter the user name and password to connect to the database.
-
URL connection string - The JDBC connection string.
-
-
-
Click
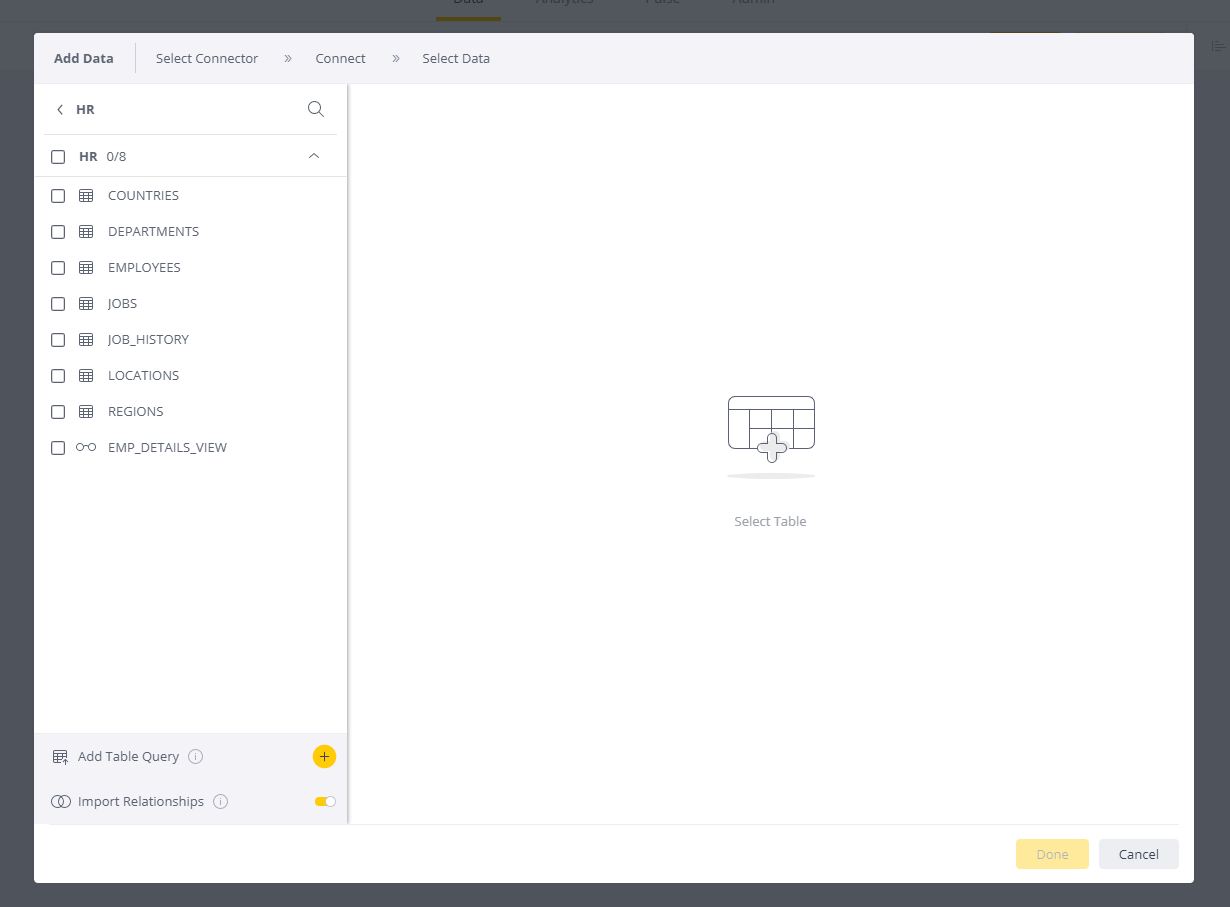
 . A list of tables in the database is displayed. All tables and views associated with the database appear in a new window.
-
Select a database. The list of tables in that database appears.
-
From the Tables list, select the relevant table or view.
You can click
 next to the relevant table or view to see a preview of its data. When you select the table or view, two new options are displayed at the bottom of the list, Import Relationships and Add Live Table Query (for Live), or Add Custom Import SQL (for ElastiCube).
 -
(Optional) By default, existing relationships between tables are automatically replicated in the ElastiCube. You can disable this by toggling the Import Relationships switch.
-
(Optional) Click + to to use SQL to customize the data. For more information, see Creating Custom Live Table Queries or Importing Data with Custom Queries.
-
After you have selected all the relevant tables, click Done. The tables are added to your schema in Sisense.