Manually Installing Sisense Helm Chart - Multinode/Cloud
Last updated: June 10, 2026
| Tier | Deployment |
|
|
You can install the Sisense Helm chart itself directly on your Kubernetes cluster, meaning installing the Sisense app itself, without using the sisense.sh script.
Prerequisites
- General prerequisites: Checking the Prerequisites and Planning Your Configuration.
-
You must have a pre-installed Kubernetes. Have your own kubernetes cluster or Install the kubernetes cluster (you can use the Sisense installation to only install k8s). You also must be connected to your Kubernetes cluster (i.e., you can do
kubectlcommands such askubectl get pod, and others).
For example: To install Kubernetes via the sisense.sh script, modify the installer/extra_values/installer/installer-values.yaml file, and make sureinstall_k8s_only: true, which will only install Kubernetes and will exit without Sisense installation.
-
Manually label your Kubernetes nodes. Each of your nodes must have at least one of the following labels and values:
-
node-${NAMESPACE}-Application=true
-
node-${NAMESPACE}-Query=true
-
node-${NAMESPACE}-Build=true
-
And remove node taint node-role.kubernetes.io/master:NoSchedule from all nodes.
For example:
kubectl label node ${your_node_1} node-${NAMESPACE}-Application=true --overwrite=true
kubectl label node ${your_node_1} node-${NAMESPACE}-Query=true --overwrite=true
kubectl label node ${your_node_2} node-${NAMESPACE}-Application=true --overwrite=true
kubectl label node ${your_node_2} node-${NAMESPACE}-Query=true --overwrite=true
kubectl label node ${your_node_3} node-${NAMESPACE}-Build=true --overwrite=true

kubectl taint nodes --all node-role.kubernetes.io/master:NoSchedule-
Note:
If you are using a cloud managed K8s or OpenShift, you may not be able to use the kubectl label node command, and you will have to modify the node labels via the Cloud/OpenShift provider’s UI or CLI command.
-
Only if you are installing Sisense without cluster visibility, create your Sisense project (namespace).
CopyNAMESPACE=sisense #for example
kubectl create ns ${NAMESPACE}
-
Install your own Storage Classes (or you can use the same Storage Class for both RWX and RWO):
-
One for RWX (Read/Write many, for the Sisense apps themselves)
-
One for RWO (Read/Write once, for the stateful sets, such as
MongoDB/ZooKeeper/RabbitMQ)Storage Class installation exampleFor this example, assume there is an NFS server with an NFS path, so we will install an NFS Storage Class, and we will use it for both
RWXandRWO.CopySTORAGE_NAMESPACE=kube-system
helm repo add csi-driver-nfs https://raw.githubusercontent.com/kubernetes-csi/csi-driver-nfs/master/charts
helm install csi-driver-nfs -n ${STORAGE_NAMESPACE} csi-driver-nfs/csi-driver-nfs --version v4.4.0
kubectl --namespace=${STORAGE_NAMESPACE} get pods --selector="app.kubernetes.io/instance=csi-driver-nfs" --watch
# Wait until all pods are "Running" and then hit CTRL+CCreate the file
storageclass-nfs.yamlwith the following content:(Example for NFS server:
10.192.168.32)(Example for NFS path:
/mnt/share)Copy---
apiVersion: storage.k8s.io/v1
kind: StorageClass
metadata:
name: nfs-csi
provisioner: nfs.csi.k8s.io
parameters:
server: <Your NFS server address>
share: <Your NFS server path>
# csi.storage.k8s.io/provisioner-secret is only needed for providing mountOptions in DeleteVolume
# csi.storage.k8s.io/provisioner-secret-name: "mount-options"
# csi.storage.k8s.io/provisioner-secret-namespace: "default"
reclaimPolicy: Delete
volumeBindingMode: Immediate
mountOptions:
- nfsvers=4.1Create the Storage Class
nfs-csiwith the following command:Copykubectl apply -f storageclass-nfs.yaml
# See that Storage Class is created:
kubectl get sc
NAME PROVISIONER RECLAIMPOLICY VOLUMEBINDINGMODE ALLOWVOLUMEEXPANSION AGE
nfs-csi nfs.csi.k8s.io Delete Immediate false 43s
-
If you would like to use the internal monitoring app, see Installing/Updating Sisense Internal Monitoring. Note: This is not supported if Installing Sisense without ClusterVisiblity.
Sisense Helm Chart Installation
-
Add the Sisense helm repo, and run a quick update to sync with the remote repo:
Copyhelm repo add sisense-fusion https://data.sisense.com/linux/helm/charts/fusion
helm repo update -
Search the available chart version via one of the following commands:
CopySISENSE_VERSION=<YOUR SISENSE VERSION>
# Example:
# SISENSE_VERSION=L2024.1.0.46
helm search repo sisense-fusion -l | grep ${SISENSE_VERSION}
sisense-fusion/sisense 2024.1.046 L2024.1.0.46 Sisense Linux Deployment
# In the case above, you'll need to install sisense version 2024.1.046 (Following the SemVer 2 convention)
Upgrading an Existing Sisense Installation
-
If you already have your own predefined multinode-values.yaml file (which you used from previous installations), and you are only upgrading the Sisense version, perform the following command:
# You can use other namespace if you wish
NAMESPACE=sisense
SISENSE_SEMVER=<You Sisense version in format SemVer 2>
# Example, for Sisense version "L2024.1.0.46":
# SISENSE_SEMVER=2024.1.046

helm upgrade -n ${NAMESPACE} sisense sisense-fusion/sisense --version ${SISENSE_SEMVER} -f multinode-values.yaml-
Continue with Post Installation.
First Sisense Installation
If this is the first time you are installing Sisense, follow these instructions.
-
Download the multinode-values.yaml file to your server: multinode-values.yaml.
-
Edit any values that you need to set (for example,
securityContextparameters, such asrunAsUserorrunAsGroup, etc…). See Sisense Helm Chart Parameters.
You must set the following parameters:-
Under
global: make sure thatclusterMode.enabled: is set to true -
Under
global: setstorageClass: <Your RWO storageClass name> (For example: gp3) -
Under
grafana>persistence: setstorageClassName: <Your RWO storageClass name> (For example: gp3) -
Under
sisense-utils: setrwxScName: <Your RWX storageClass name> (For example: nfs-csi) -
If your Kubernetes cluster is cloud managed (EKS/AKS/GKE):
-
set
global.isKubernetesCloudto true -
set
global.kubernetesCloudProviderto aws / azure / gcp -
set
cloudLoadBalancer.enabledto true (This sets up the LoadBalancer service api-gateway-external with an address from the cloud provider)
-
-
If you are installing Sisense without cluster visibility, set
global.clusterVisibility: to false(Reminder: Sisense without cluster visibility does not support Sisense internal monitoring and logging services.)
-
-
If you have installed Sisense Internal Monitoring, then in the multinode-values.yaml file, find each location (there are eight) with the following comment, and follow the instructions in the comments:
# If installed Sisense Prometheus ...Examples:
Copyglobal:
...
monitoring:
# If installed Sisense Prometheus, set below to "true"
internal: false
mongodb:
...
# If installed Sisense Prometheus, uncomment below "metrics" section, and make sure of the correct monitoring "namespace"
#metrics:
# enabled: true
# collector:
# all: true
# compatibleMode: true
# extraFlags: "--discovering-mode"
# serviceMonitor:
# enabled: true
# namespace: monitoring
# labels:
# release: sisense-prom-operator
-
If you are installing Sisense on a namespace other than sisense, then in the values.yaml file, find each location (there are eight) with the following comment, and follow the instructions in the comments:
# If installed Sisense on a different namespace than "sisense" ...Examples:
Copyzookeeper:
...
# If installed Sisense on a different namespace than "sisense", then in the last line of "configuration:", switch "sisense" to correct namespace
# Example for namespace "mynamespace"
# server.1=mynamespace-zookeeper-0.mynamespace-zookeeper-headless.mynamespace.svc.cluster.local:2888:3888
# server.2=mynamespace-zookeeper-1.mynamespace-zookeeper-headless.mynamespace.svc.cluster.local:2888:3888
# server.3=mynamespace-zookeeper-2.mynamespace-zookeeper-headless.mynamespace.svc.cluster.local:2888:3888
configuration: |-
tickTime=2000
initLimit=10
...
server.1=sisense-zookeeper-0.sisense-zookeeper-headless.sisense.svc.cluster.local:2888:3888
server.2=sisense-zookeeper-1.sisense-zookeeper-headless.sisense.svc.cluster.local:2888:3888
server.3=sisense-zookeeper-2.sisense-zookeeper-headless.sisense.svc.cluster.local:2888:3888
zookeeper:
...
affinity:
nodeAffinity:
requiredDuringSchedulingIgnoredDuringExecution:
# If installed Sisense on a different namespace than "sisense", switch in below array from "sisense" to correct namespace
nodeSelectorTerms:
- matchExpressions:
- key: "node-sisense-Application"
operator: In
values:
- "true"
- matchExpressions:
- key: "node-sisense-Build"
operator: In
values:
- "true" -
Install Sisense using the values file:
Copy# You can use other namespace if you wish
NAMESPACE=sisense
SISENSE_SEMVER=<You Sisense version in format SemVer 2>
# Example:
# SISENSE_SEMVER=2024.1.046
helm upgrade -n ${NAMESPACE} sisense sisense-fusion/sisense --version ${SISENSE_SEMVER} -f multinode-values.yaml --install --create-namespace
After ~30 seconds, the following message appears (the message could be slightly different, depending on given values; for example, if using a LoadBalancer):
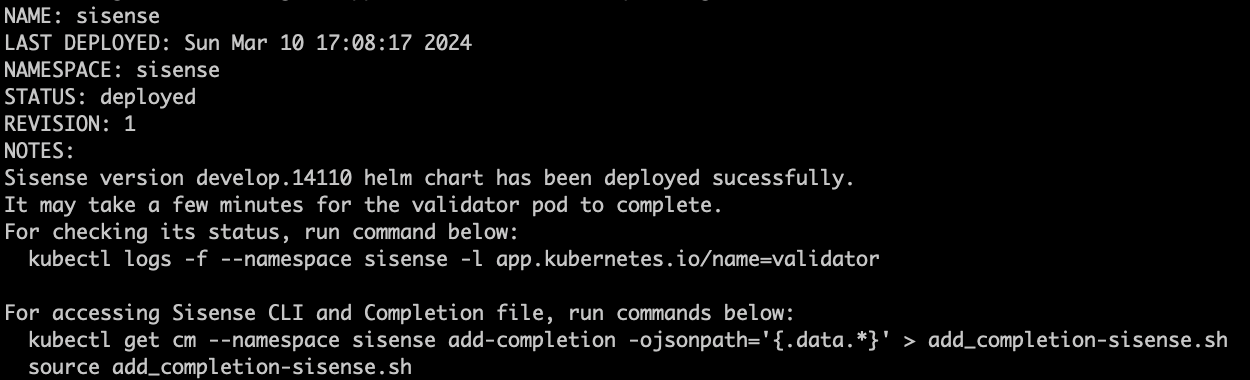
Post Installation
When you see the message above, the Sisense app is undergoing the deployment process. Use the following command to follow its progress until it is completed:
kubectl logs -f --namespace ${NAMESPACE} -l app.kubernetes.io/name=validator
Initially, you can see the services as they are being deployed:
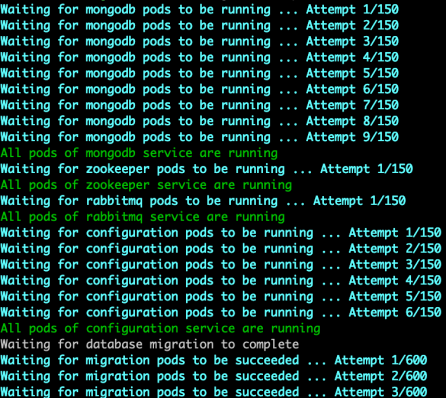
When all of the services are up, the message Sisense installation process completed successfully appears.
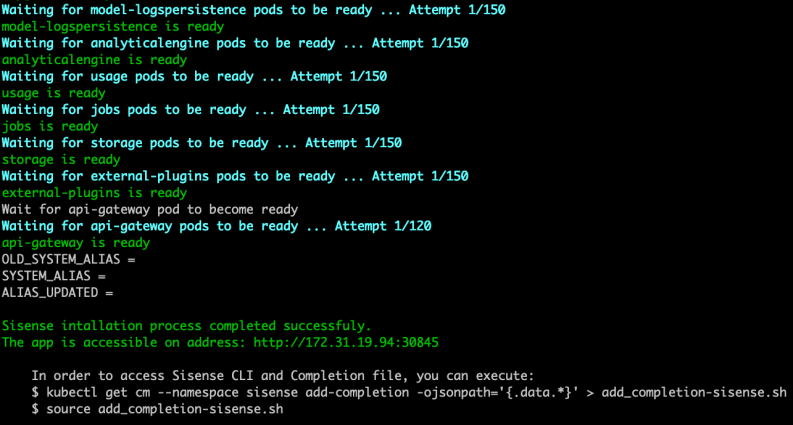
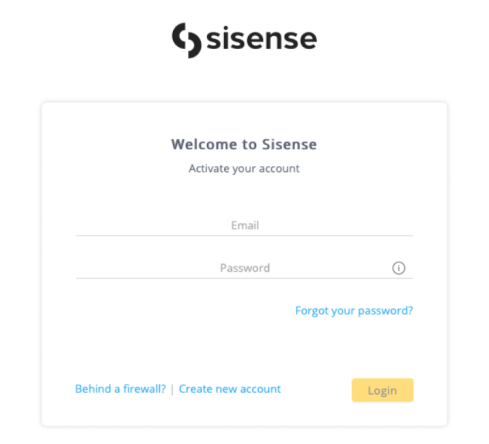
Once the installation is complete, some Sisense pods will remain in the Init state until the license activation. To activate the license, navigate to the Sisense web application URL (without extra paths such as /app/account/login) in your browser and enter your license credentials.
Enter your Sisense address, and run the activation.