Installing Sisense without ClusterVisiblity
Last updated: June 10, 2026
| Tier | Deployment |
|
|
You can install Sisense without cluster visibility, meaning that Sisense is installed on a Kubernetes namespace, and it can only access objects within the same namespace. This means that:
-
It will not be able to get Kubernetes node names (kubectl get nodes)
-
It will not be able to access pods from other namespaces and vice-versa (you will not be able to use Prometheus and Grafana in order to view pod usage, and you will not be able to use the Logging Helm chart for generating log files as well)
This is primarily used for security reasons.
Note: Internal monitoring is not supported on installations without cluster visibility.
Prerequisites
-
Ensure that you fulfill the general prerequisites listed in Checking the Prerequisites and Planning Your Configuration.
-
You must have a pre-installed Kubernetes. Have your own kubernetes cluster or Install the kubernetes cluster (you can use the Sisense installation to only install k8s). You also must be connected to your Kubernetes cluster (i.e., you can do
kubectlcommands such askubectl get pod, and others).
For example: To install Kubernetes via the sisense.sh script, modify the installer/extra_values/installer/installer-values.yaml file, and make sureinstall_k8s_only: true, which will only install Kubernetes and will exit without Sisense installation.
NAMESPACE=sisense #for example
kubectl create ns ${NAMESPACE}-
Label your Kubernetes nodes with the Sisense labels. Each of your nodes must have at least one of the following labels and values:
-
node-${NAMESPACE}-Application=true
-
node-${NAMESPACE}-Query=true
-
node-${NAMESPACE}-Build=true
You must also remove node taint node-role.kubernetes.io/master:NoSchedule from all nodes.
For example:
kubectl label node ${your_node_1} node-${NAMESPACE}-Application=true --overwrite=true
kubectl label node ${your_node_1} node-${NAMESPACE}-Query=true --overwrite=true
kubectl label node ${your_node_2} node-${NAMESPACE}-Application=true --overwrite=true
kubectl label node ${your_node_2} node-${NAMESPACE}-Query=true --overwrite=true
kubectl label node ${your_node_3} node-${NAMESPACE}-Build=true --overwrite=true

kubectl taint nodes --all node-role.kubernetes.io/master:NoSchedule-
Note:
If you are using a cloud managed K8s or OpenShift, you may not be able to use the kubectl label node command, and you will have to modify the node labels via the Cloud/OpenShift provider’s UI or CLI command.
-
Install your own Storage Classes (or you can use the same Storage Class for both RWX and RWO):
-
One for RWX (Read/Write many, for the Sisense apps themselves)
-
One for RWO (Read/Write once, for the stateful sets, such as
MongoDB/ZooKeeper/RabbitMQ)Storage Class installation exampleFor this example, assume there is an NFS server with an NFS path, so we will install an NFS Storage Class, and we will use it for both
RWXandRWO.CopySTORAGE_NAMESPACE=sisense
helm repo add csi-driver-nfs https://raw.githubusercontent.com/kubernetes-csi/csi-driver-nfs/master/charts
helm install csi-driver-nfs -n ${STORAGE_NAMESPACE} csi-driver-nfs/csi-driver-nfs --version v4.4.0
kubectl --namespace=${STORAGE_NAMESPACE} get pods --selector="app.kubernetes.io/instance=csi-driver-nfs" --watch
# Wait until all pods are "Running" and then press CTRL+CCreate the file
storageclass-nfs.yamlto appear as follows:(Example for NFS server:
10.192.168.32)(Example for NFS path:
/mnt/share)Copy---
apiVersion: storage.k8s.io/v1
kind: StorageClass
metadata:
name: nfs-csi
provisioner: nfs.csi.k8s.io
parameters:
server: <Your NFS server address>
share: <Your NFS server path>
# csi.storage.k8s.io/provisioner-secret is only needed for providing mountOptions in DeleteVolume
# csi.storage.k8s.io/provisioner-secret-name: "mount-options"
# csi.storage.k8s.io/provisioner-secret-namespace: "default"
reclaimPolicy: Delete
volumeBindingMode: Immediate
mountOptions:
- nfsvers=4.1Use the following command to create the Storage Class
nfs-csi:Copykubectl apply -f storageclass-nfs.yaml
# See that Storage Class is created:
kubectl get sc
NAME PROVISIONER RECLAIMPOLICY VOLUMEBINDINGMODE ALLOWVOLUMEEXPANSION AGE
nfs-csi nfs.csi.k8s.io Delete Immediate false 43s
Installing Sisense Without Cluster Visibility
-
Enter the following:
Copyexport SISENSE_VERSION=<YOUR SISENSE VERSION>
wget https://data.sisense.com/linux/sisense_installer-${SISENSE_VERSION}-DockerHub.tar.gz
tar -xvf sisense_installer-${SISENSE_VERSION}-DockerHub.tar.gz
cd sisense-${SISENSE_VERSION}
vi cluster_config.yaml # or cloud_config.yaml/openshift_config.yaml/config.yaml, whichever you prefer -
Edit the values as needed. See Installing Sisense on Linux, step 5 ("Deployment"), for information about the various parameters.
Ensure that these parameters are configured as follows:-
update: true(even if it is your first time installing Sisense, this will skip the Kubernetes installation) cluster_visibility: falserwx_sc_name: "<Your RWX Storage Class name>"rwo_sc_name: "<Your RWO Storage Class name>"
-
Sample cluster_config.yaml file:
### INSTALLATION PARAMETERS

## Cluster Nodes - define the following:
#1. Internal IP of the machine.
#2. External IP of the machine.
#3. Node Roles: application, query, build.
#4. Second block device path.

# Note: To add/remove node(s) into/from existing k8s cluster, simply add/remove the desired node in below section "k8s_nodes"
# In addition, change the parameter "update_k8s_version" to true, and rerun sisense.sh script
k8s_nodes:
  - { node: node1, roles: "application, query" }
  - { node: node2, roles: "application, query" }
  - { node: node3, roles: "build" }

## Deployment size is used to determine the maximum pod limits allocated for application
## Possible values: small/large
deployment_size: "small"

## Sisense will use Kubernetes ClusterRole in order to manage the tenant
cluster_visibility: false

## In case of offline installation (private or public docker registry is required) - true/false
## If your docker registry is private Sisense will generate a pull secret for you
offline_installer: false
## An IP or DNS name for your Docker registry
#docker_registry: ""
## Whether your registry requires credentials to pull images or not
private_docker_registry: false

## Enable delta approach for shared dashboards/widgets
enable_widget_deltas: false

## Update current installation. - true/false
update: true

## show maintanace page during upgrade process
notify_on_upgrade: true

## In case of running installation from Bastion/Remote machine - true/false
remote_installation: false

## Application DNS Name.
#1. When empty, first node external_ip will be configured
#2. When is_ssl is true, configure the CN name
#3. Add http:// or https:// as a prefix when using external Load Balancer for Commom name
application_dns_name: ""

## Linux user of the servers (UID 1000)
linux_user: "ubuntu"

## SSH Key Path or Password is required, when ssh_key is empty, password will be prompted
ssh_key: "~/.ssh/id_rsa"

## To define user other than UID 1000, configure the following parameters
run_as_user: 1000
run_as_group: 1000
fs_group: 1000

# Support high availability
# Load sisense service in active/active redundancy
high_availability: true

### Cluster storage types -  Supported types:
## On-Prem HA - nfs, fsx, efs.
storage_type: ""

## RWX Access Mode StorageClass name (e.g: Ceph RBD, Trident, NFS, etc..).
rwx_sc_name: "nfs-csi"

## RWO Access Mode StorageClass name (gp2 sc, default gcp sc, Azure disks sc, or any RWX sc)
rwo_sc_name: "nfs-csi"

## AWS EFS
efs_file_system_id: ""
efs_aws_region: ""

## AWS FSX
fsx_dns_name: ""
fsx_mount_name: ""

## NFS - GKE (Filestore), Azure, On-Prem
nfs_server: ""
nfs_path: ""

## Disks size (GB)
## No need to change mongodb_disk_size, zookeeper_disk_size
sisense_disk_size: 70
mongodb_disk_size: 20
zookeeper_disk_size: 2

## System time zone.
## Format for example:  UTC | US/Central | US/Pacific | US/Eastern | Asia/Jerusalem | Asia/Tokyo | Etc/GMT+6
timezone: "UTC"

## Name of Namespace
namespace_name: sisense

## Gateway port of api-gateway service - endpoint of Sisense in Non-Secured mode.
gateway_port: 30845

### SSL SETUP
## Activate Secured Sisense in HTTPS, define key and cert certificates.
is_ssl: false
ssl_key_path: ""
ssl_cer_path: ""

### WEAVE IPSEC ENCRYPTION NETWORK PLUGIN
## Use weave when deploying cluster on Microsoft Azure, Google vms
## Weave password is generated randomly - true/false
weave_enabled: false

## Update current Kubernetes version - true/false
update_k8s_version: false

## Recover Kubernetes componentes - true/false
# This will restore fron the last existing ETCD snapshot (up to 12 hours back)
# (ETCD snapshots location: /opt/rke/etcd-snapshots)
recover_kubernetes: false

## Container network interface  - calico/flannel
cni_plugin: calico

### PROXY SETTINGS
# Set these proxy values in order to update package manager and docker daemon to use proxies
# http_proxy:
# https_proxy:
# no_proxy:

### MONITORING
# It doesn't matter if cluster_visibility: false,
# even if you put both below on "true" it won't install them

## Grafana and Prometheus - true/false
internal_monitoring: false

### UNINSTALL SISENSE
## In cluster installed by Sisense - Uninstall whole K8S cluster with Sisense services - true/false
## In cluster installed by customer - Uninstall Cluster services such as: kube-prometheus-stack, nfs
uninstall_cluster: false

## Uninstall Sisense, Removing only Sisense Kubernetes components and remaing K8S Cluster alive, true/false
uninstall_sisense: false

## Removing all Sisense data - true/false
remove_user_data: false-
Run the installation:
./sisense.sh <your config file>
# Example: ./sisense.sh cluster_config.yaml

# After it shows you your configuration and you're ok with it, just type "Y" or "y" and hit enter
The following Configuration will be delegated to Sisense Installation, Please confirm:
{
  "k8s_nodes": [
    {
      "node": "node1",
      "internal_ip": "172.31.24.242",
      "external_ip": "172.31.24.242",
      "disk_volume_device": "/dev/sdb",
      "roles": "application, query"
    },
    ...
    ...
    ...
  ],
  "deployment_size": "small",
  "cluster_visibility": false,
  "offline_installer": false,
  "private_docker_registry": false,
  "enable_widget_deltas": false,
  "update": true,
  ...
  ...
  ...
  "internal_monitoring": false,
  "uninstall_cluster": false,
  "uninstall_sisense": false,
  "remove_user_data": false
}
Do you wish to install Sisense develop.13923 (y/n)? y # Hit Enter-
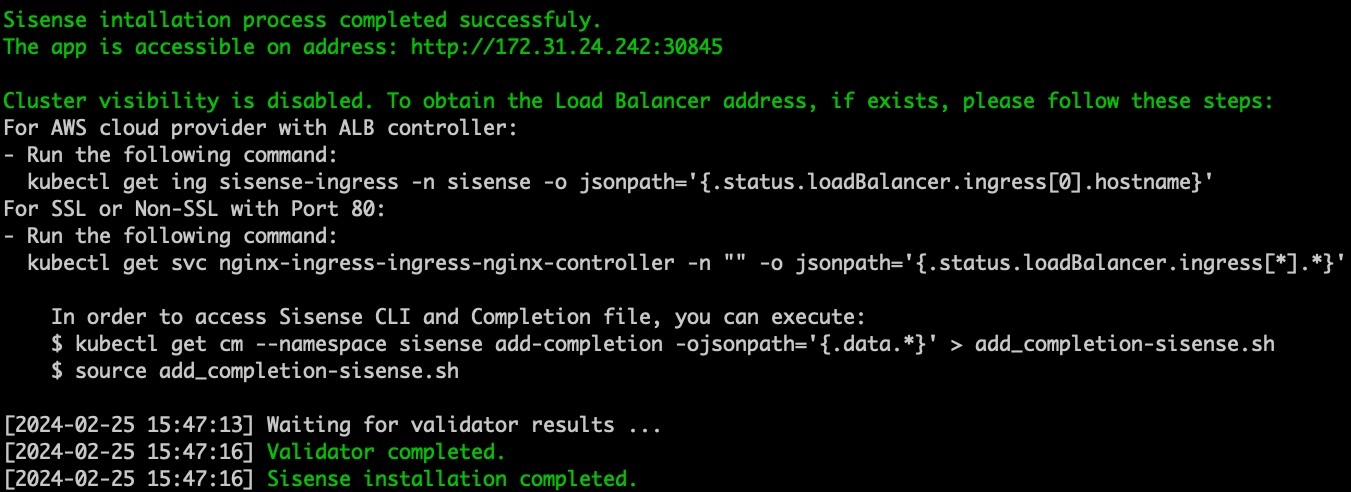
Once the installation is complete, you can activate and log in to your Sisense app.