Deploying a Custom Connector
Last updated: June 10, 2026
| Tier | Deployment |
|
|
|
JDBC is one of the most widely supported Java APIs for connecting to a variety of relational databases. With Sisense's custom connector, you can leverage JDBC drivers to connect to additional data sources.
For a complete list of supported connectors, see Data Source Connectors.
Sisense provides a platform for you to create a connector for a non-native JDBC-supported data source.
Note:
-
Some data sources may not fully support all functionality used by Sisense and, therefore, some functionality may not work.
-
For the Calcite 1.36 upgrade - Customers using the GenericJDBC connector with a custom dialect file will need to recompile and potentially update your code. All custom dialect files must be recompiled after the upgrade because the underlying Calcite JAR has changed. Even if no code changes are needed, the old compiled
.classfile may not work correctly with the new Calcite runtime.
To recompile: re-upload the dialect.javasource file through the connector management CLI. The system will compile it against the new Calcite JARs automatically.Breaking API changes may occur. See the Breaking Changes in the 2026.2 Release Notes.
The following are three common use cases:
-
A custom connector to an ElastiCube model. This is used for CData connectors. See Connecting to Custom Connectors with JDBC Drivers
Example:
Connecting Sisense to an ElastiCube to Google Analytics using a CData driver.
-
A custom connector to a Live model using one of the Sisense-provided dialects. This is used to connect to a live model, where the data source can work with a dialect that is similar to the Sisense-provided dialect.
Example:
Connecting Sisense to a live Amazon Aurora PostgreSQL source that can use the Sisense-provided PostgreSQL dialect with Amazon Aurora JDBC driver.
-
A custom connector to a Live model using your own custom dialect.
Example:
Connecting Sisense to a live MongoDB source with a custom dialect.
To create a custom connector:
-
Click the Admin tab.
-
From the Server & Hardware menu, click System Management.
-
In the System Management pane, click Configuration.
-
In the System Configuration page, scroll to the bottom and click Manage Connectors.
-
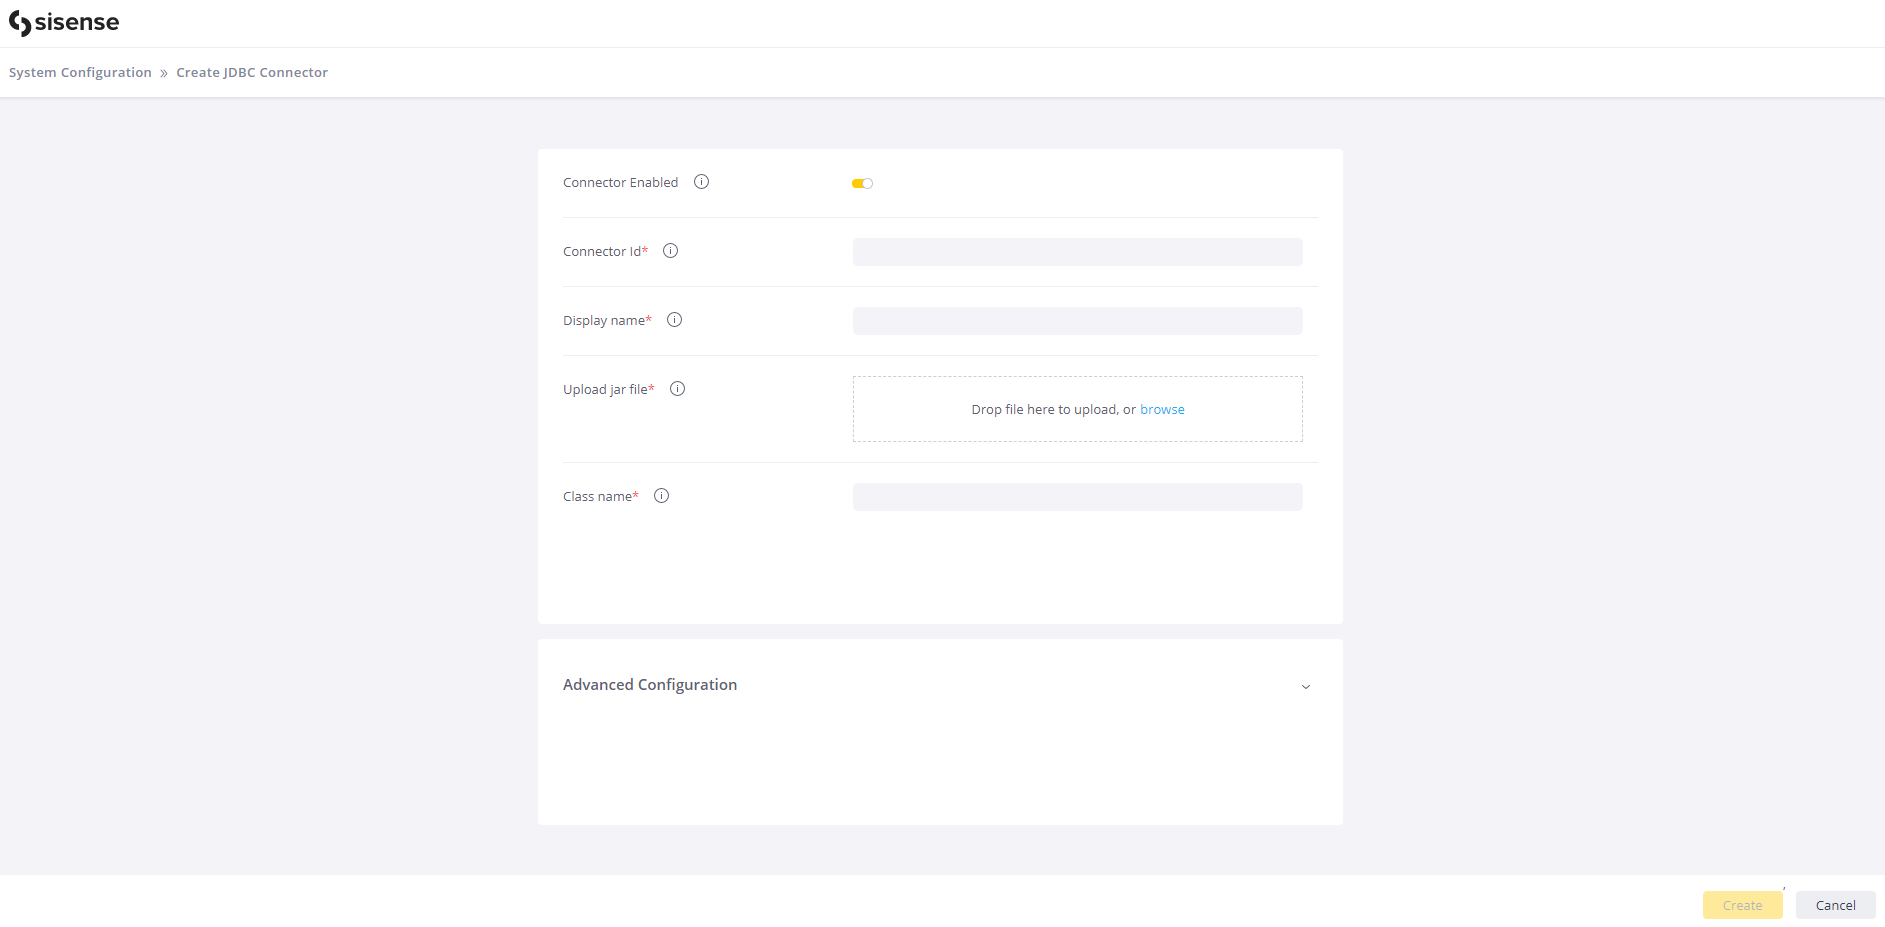
In the left pane menu, click +JDBC Connector. The Create JDBC Connector page appears.
-
Populate the mandatory parameters:

-
Connector ID - Enter the ID of the connector.
-
Display Name - Enter the display name that identifies the connector in the Data Designer.
Note: When using the new JDBC framework, the Display Name of a custom connector must be consistent across all environments (e.g., development, staging, production, et.c).
If the connector name differs between instances (e.g., GenericJDBC_3 vs. GenericJDBC_6), importing data models or switching connections will fail, as Sisense cannot resolve the connection during migration.
Connector creation and naming are entirely customer-managed in this framework. To ensure smooth model portability, always use the same connector name across all Sisense environments.
-
Upload jar file - Upload the relevant JDBC driver JAR file for the location that you want to connect to (see Connecting to Custom Connectors with JDBC Drivers.) You must verify that the JAR file has been tested.
Note: Some connectors require more than one JAR file (for example, the CDATA Rest connector). You are expected to update each JAR file and save them, but the last file to load must be the JDBC driver.
-
Class name - Enter the name of the main class from the driver, taken from the driver provider. The connector uses this name to connect to the driver.
-
-
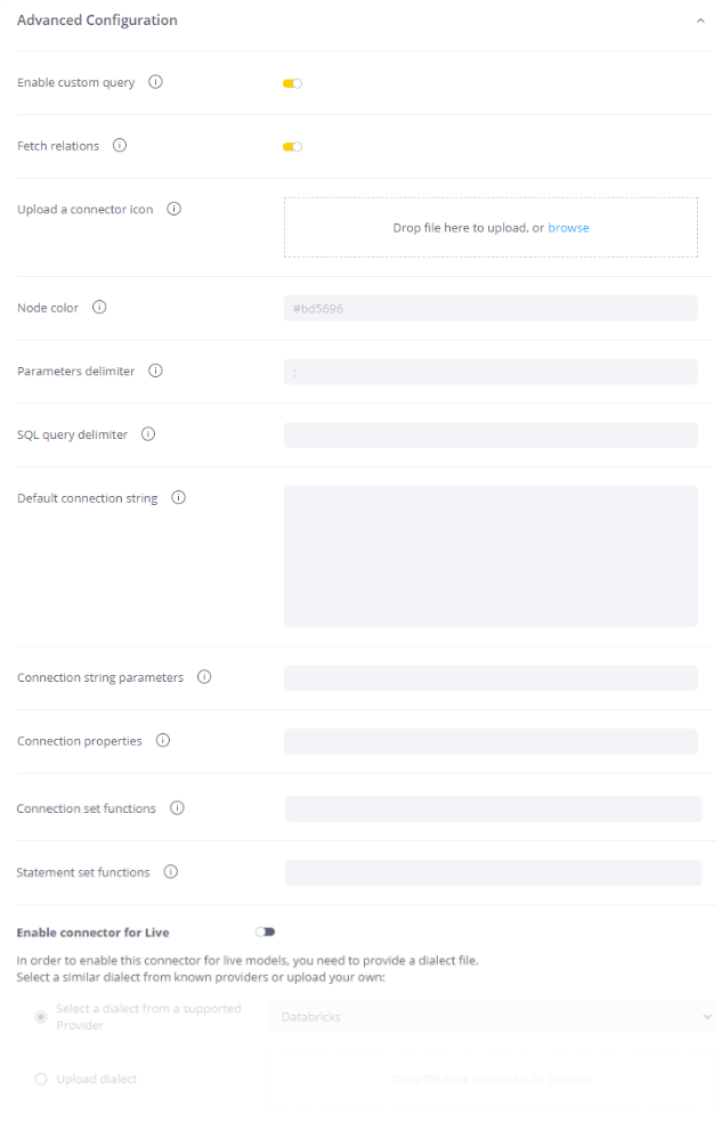
If necessary, open the Advanced Configuration drop-down and populate the optional parameters:
-
Enable custom query (default: true) - Enable or disable the use of a custom query. When enabled, the data modeler can use a custom import query for the connection.
-
Fetch relations - Allows using and adding relationships between tables in the data model.
-
Upload a connector icon - Upload the SVG file with the icon to display for this connector in the Connections list. The name of the file must be icon.svg.
-
Node color - Select a color, in Hex format only, to identify the connector in the Data Model. It is recommended to use the color schema of the data source.
-
Parameters delimiter - The delimiter that separates connection string parameters.
-
SQL query delimiter - The delimiter that separates SQL statements. It is used for custom import queries.
-
Default connection string - Used when creating the specific connection in the data model. Use parameters as instructed by the driver’s provider.
-
Connection string parameters - The connection string parameters that are added to all connections.
-
Connection properties - Additional properties for every connection created by this connector.
-
Connection set functions - Supported functions: autoCommit, readOnly, transactionIsolation.
-
Statement set functions - The JDBC function called after every connection is established.
-
Enable connector for Live - Enable this for live JDBC usage. To enable this connector for live models, you must provide a dialect file.
-
Select a dialect from a supported Provider - Select a dialect from the relevant provider (for the list of providers, see Analytical Engine). The selection determines the syntax of the generated SQL query.
-
Upload dialect - Upload your own dialect, a manual Java class to resolve SQL dialect issues.
-
-
-
Click Create.
Now that you have created the custom connector, see Creating a Custom Connection, including: