Connecting to Amazon Redshift
Sisense enables quick and easy access to databases, tables and views contained within Amazon Redshift databases.
You can import your Redshift data into a Sisense ElastiCube or Live models, using Introducing Live Models.
To add data from Amazon Redshift:
- In the Data page, either:
- Open an ElastiCube or create a new data model
- Open a Live model, or create a new live model
-
In the Model Editor, click
 . The Choose Connector window is displayed.
-
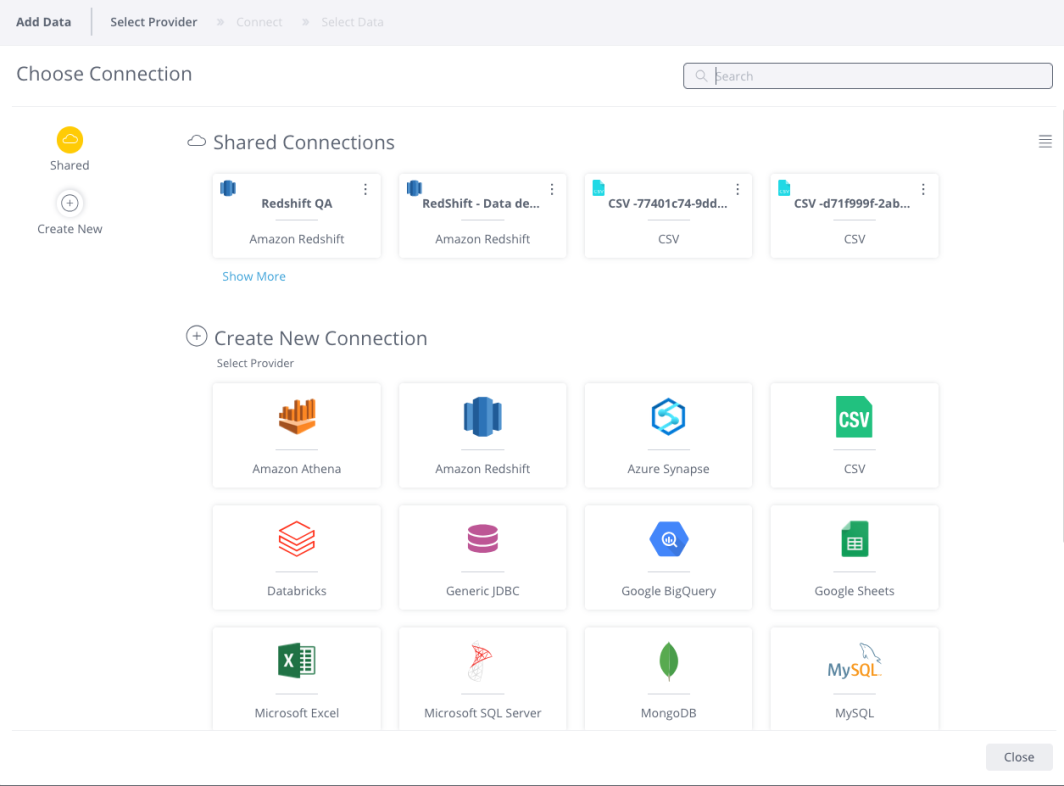
Choose an available managed connection, or create a new connection, for Amazon Redshift. The Amazon Redshift area is displayed.
- Click Amazon Redshiftto open the Amazon Redshift settings.
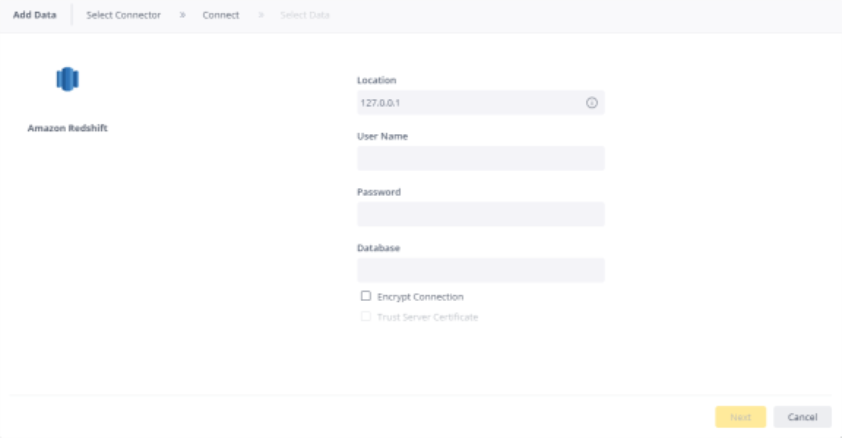
- Enter the following details:
- Location: Enter the Amazon Redshift cluster endpoint. This server address should include the endpoint, port, and database. By default, the port is 5439, for example: [Endpoint]:5439[Database]. To connect to a database running on your own computer, enter localhost.
- User Name and Password: Enter your Redshift account credentials.
- Database: Enter the name of the default database you will use for authentication.
The default Database is an optional property in the connection to a data source. When specified, it acts as a starting point or shortcut, automatically selecting a database during the connection setup to streamline user workflows.
IMPORTANT:
The default Database is not a security feature. It does not restrict Sisense users from accessing other databases within the data source. Access should be regulated through user permissions in the Redshift database management system.
- (Optional) Select Encrypt Connection to configure the driver to encrypt all communication with Redshift before sending it over the network, and then select Trust Server Certificate.
- (Optional) In Additional Parameters, enter additional configuration options by appending key-value pairs to the connection string (e.g., port=5433;). For a full list of connection string options, click here .
- Click
 .
. - Under the Select Data tab, on the left side is a list of schemas located in your data
source. Select the relevant schema. You can find the schema easily by filtering for it using the Search field at the
top of the list.
All tables and views associated with the database appear in a new window.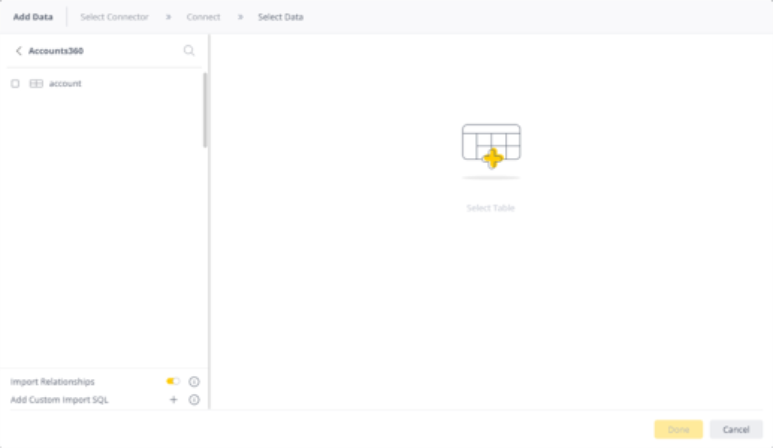
- From the Tables list, select the relevant table or view you want to work with. You can click
 next to the relevant table or view
to see a preview of the data inside it. When you select the table or view, two new options are displayed at the
bottom of the list, Import Relationships and Add Custom Import SQL.
 - (Optional) By default, existing relationships between tables are automatically replicated in the ElastiCube or live model. You can disable this by toggling the Import Relationships switch.
- (Optional)
- ElastiCube
Click + to customize the data you want to import with SQL. See Importing Data with Custom Queries for more information. - Live
Click + to customize the data you want to access with SQL. See Creating Custom Live Table Queries for more information.
- ElastiCube
- After you have selected all the relevant tables, click Done. The tables are added to your schema in Sisense.
Note:
-
If you encounter problems connecting to Amazon RedShift, see this article in the support forum.
-
Since Redshift defaults to lower case, when editing a Redshift column name in Sisense from lower case to a name with capital letters, you must perform one of the following two workarounds for the change to be able to be saved:
-
Enclose the name in double quotes
-
Disable case sensitivity in Redshift
For more information, see the following Redshift documentation: Names and indentifiers & Enable case sensitive identifier.
-
Configuring a Security Group
Create a security group in the same VPC as the Redshift cluster that you are connecting to Sisense. You can create a security group in Services > VPC > Security > Security Groups.
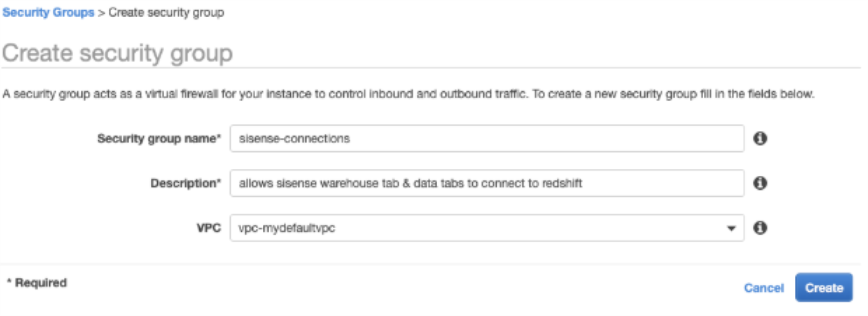
After you create it, add inbound rules to allow traffic from Sisense Cloud as well as the Sisense deployment over the Redshift port (default 5439). The Sisense Cloud IP address is 54.186.74.45 and 54.187.196.247 and the Sisense deployment address will be the IP Address of your Sisense URL (for example, hypothetical Sisense deployment at https://analytics.example.com might have an IP address of 123.45.67.89).

Configuring a Redshift Cluster or Amazon Redshift Serverless
Find your cluster in the Amazon Redshift > Clusters menu and navigate to the Properties tab.

For Amazon Redshift Serverless, navigate to the Workgroup tab.
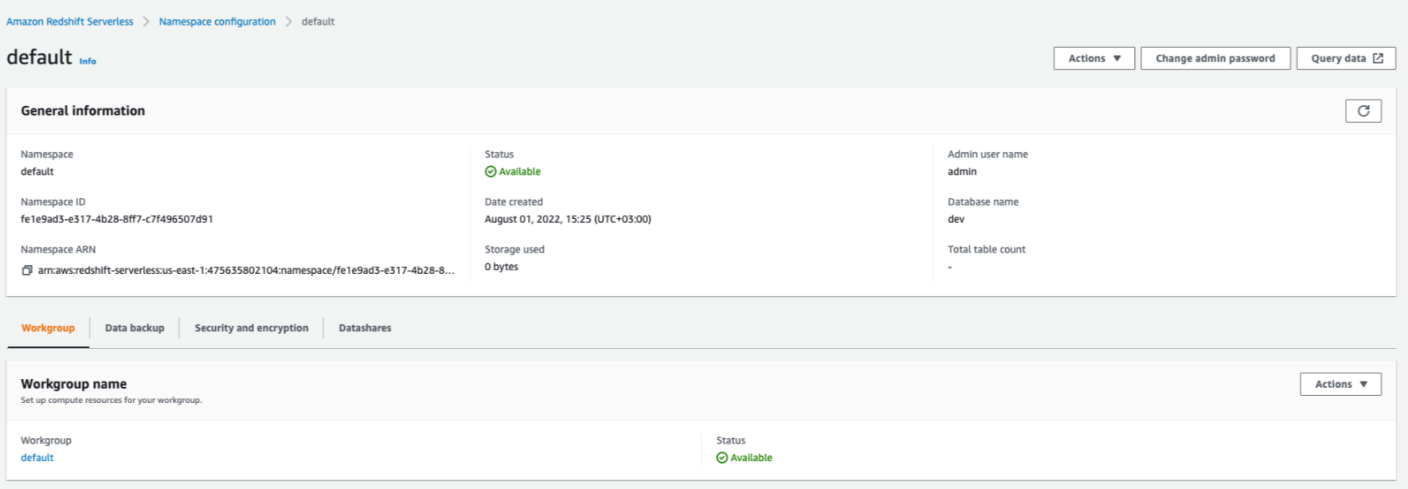
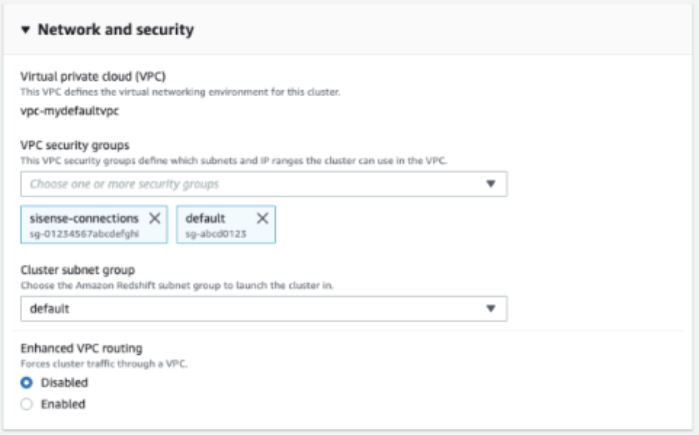
Edit the Network and security settings to attach the new security group to the Redshift cluster.
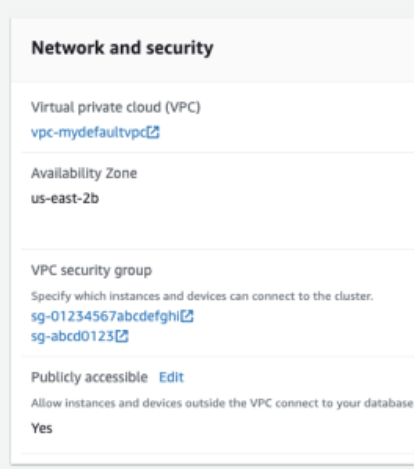
Then, ensure that Publicly accessible is set to Yes. Note, this setting has its own Edit button within the Network and security section.
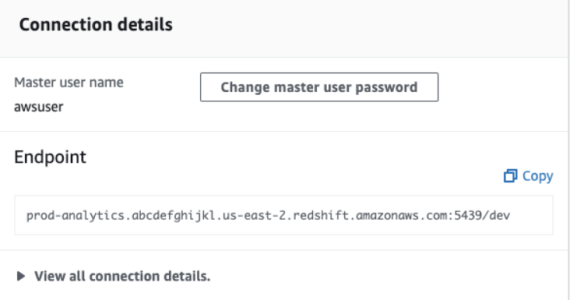
Once that is done, the endpoint needed to connect can be found in the Connection Details section on the right side of the Properties page.
