Connecting to Azure Synapse
Sisense enables easy and quick access to databases, tables and views contained with Azure Synapse databases.
You can import your data into a Sisense ElastiCube , or connect your data to a Sisense Live model, using Live Connect .
Connecting Data to a Sisense Live Model
Adding an Azure Synapse Server Live Connection
To add an Azure Synapse Live connection:
-
Open a live model. See Creating Live Models and Adding Live Connections for more information.
-
In the Model Editor, click
 . The Add Data dialog box is displayed.
-
Click Azure Synapse. The Azure Synapse Connect area is displayed.

-
In Location : Enter the computer/server IP address of the database. To connect to a database running on your own computer, enter localhost .
-
In User Name and Password , enter your Azure Synapse database credentials.
-
(Optional) Select Encrypt Connection to configure the driver to encrypt all communication with the Azure Synapse instance before sending it over the network, and then select Trust Server Certificate.
-
(Optional) In Additional Parameters , enter additional configuration options by appending key-value pairs to the connection string.
For example:- Specifying application intent:
ApplicationIntent=ReadOnly - Specifying an alternate port, such as
portNumber=1234 - Examples for additional parameters can be found here .
- Specifying application intent:
-
Click Next .
-
Under the Select Data tab, on the left side is a list of schemas located in your data source. Select the relevant schema. You can find the schema easily by searching for it through the search field at the top of the list to filter the schemas displayed. After selecting the schema, a list of the available tables and views are displayed.
-
Select a table or view. You can find the table easily by searching for it through the search field at the top of the list to filter the tables displayed.
-
Click Done . The table is added to the model.
See Publishing Live Models for information on how to publish the model and begin creating visualizations with it.
Importing Into a Sisense ElastiCube
Note:
Sisense connects to your Azure Synapse database through the default port 1433. This port should be open to Sisense so a connection can be made. Contact your IT department if this port is closed.
Importing from an Azure Synapse Database
To import data from your Azure Synapse database:
- In the Data page, open an ElastiCube or click
 to create a new ElastiCube.
 -
In the Model Editor, click
 . The Add Data dialog box is displayed.
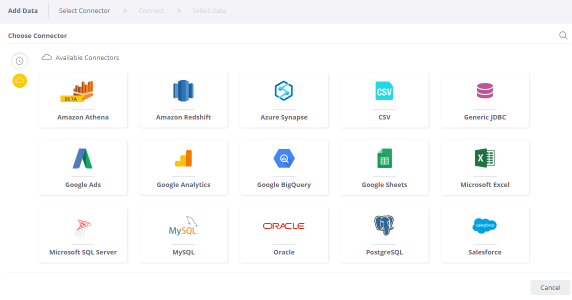
-
Click Azure Synapse. The Azure Synapse Connect area is displayed.

-
In Location: Enter the computer/server IP address of the database. To connect to a database running on your own computer, enter localhost.
-
In User Name and Password, enter your Azure Synapse database credentials.
-
(Optional) Select Encrypt Connection to configure the driver to encrypt all communication with the Azure Synapse instance before sending it over the network, and then select Trust Server Certificate.
-
(Optional) In Additional Parameters , enter additional configuration options by appending key-value pairs to the connection string.
For example:- Specifying application intent:
ApplicationIntent=ReadOnly - Specifying an alternate port, such as
portNumber=1234
Examples for additional parameters can be found here.
- Specifying application intent:
- Click
 . A list of tables in the database are displayed. All tables and views associated with the database will appear in a new window.
- From the Select Table list, select the relevant database you want to work with, and click Done . To view a preview of data contained in a particular table, select the table or view in the list and in click the Preview Table.
- After you have selected all the relevant tables, click Done.
.r.