Custom Code for ElastiCube Builds
The Custom Code functionality enables you to use an integrated Jupyter Notebook to run Python code to transform and cleanse data inside of an ElastiCube as part of the build process.
If you are not familiar with Jupyter Notebooks, see What is the Jupyter Notebook?.
Note:
Custom Code is similar to the Custom Code Transformation functionality (see Custom Code Transformation for Query Results) that is used to transform the data that is displayed in a widget.
Sisense Notebooks (see Notebooks) is not related to either of these custom code features.
With Custom Code, you can:
- Enrich and transform your data during a build
- Solve complex SQL scenarios with simplified Python
- Leverage Python libraries for solving modeling issues
- Connect to 3rd party tools to apply machine learning including AutoML from within Sisense
- Generate data
- Retrieve data from private sources by code
Note:
This functionality must be enabled by an Admin:
Admin tab > Feature Management > Advanced Analytics section > toggle on Custom Code.
Watch this video for more information:
From Sisense, Data Administrators can access the Jupyter UI to create Notebooks hosted on your Sisense server. After having created some custom Notebooks, Data Admins can attach them to the relevant ElastiCube model and define what parameters should be processed by your Notebook.
Watch this video for more information:
Watch this video for more information about using existing Jupyter Notebooks:
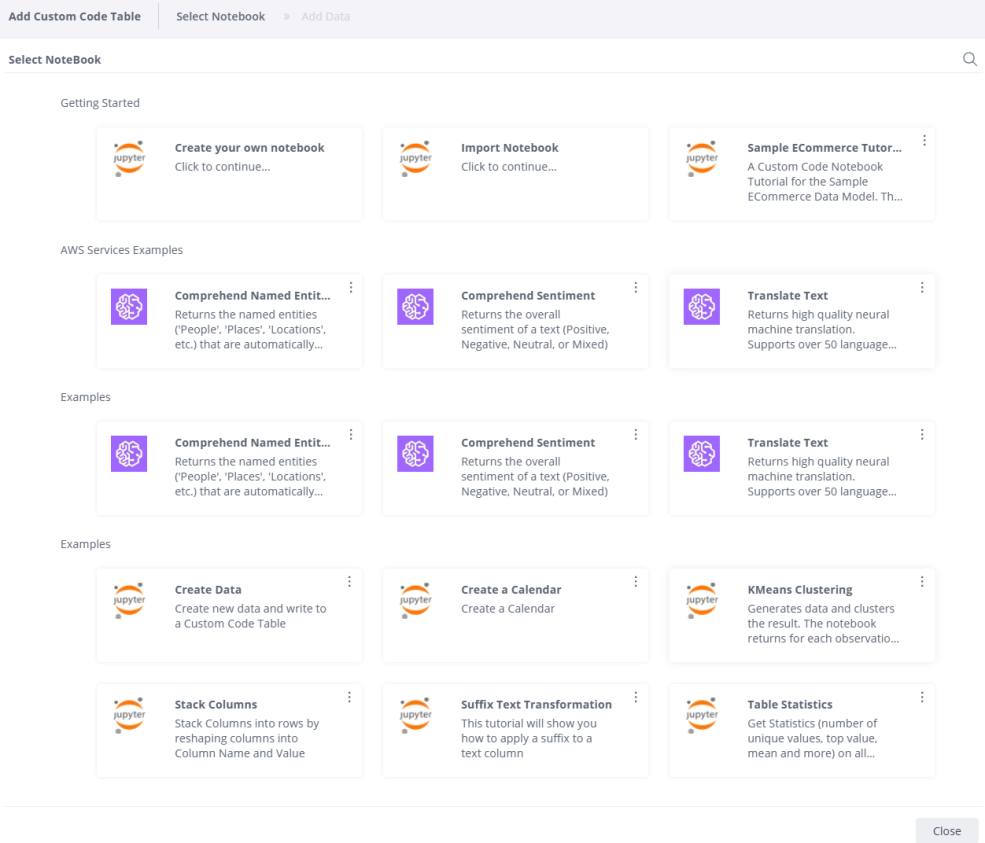
From the Data page, you can add custom code through the Notebook Library. The Notebook Library is the centralized location for your Notebooks. It contains sample Notebooks provided by Sisense, as well as custom Notebooks you can create.

After you transform or cleanse your data with your Notebooks, the updated tables or columns are added to your ElastiCube model.
Adding Notebooks
The library tiles displayed in your Notebook Library are configured according to Notebook Manifests. Each manifest holds the definitions for a single Notebook, including the text to display in the library, parameters to pass to the Notebook, and the column definitions for the output to be added to the data model.
This section describes how to create manifest files for your Notebooks and upload them.
Creating Manifest Files
Each notebook is linked to the Notebook Library by a Notebook manifest. The manifest is a JSON file that contains key-value pairs that display text in the Notebook Library and defines the schema definitions for additional parameters. These additional parameters are passed to the Notebook to determine the output columns of the notebook that will be transformed into a Custom Code table.
When creating a new Notebook, Sisense provides an easy-to-use interface to help you automatically create a manifest file.
To automatically create a new manifest file:
-
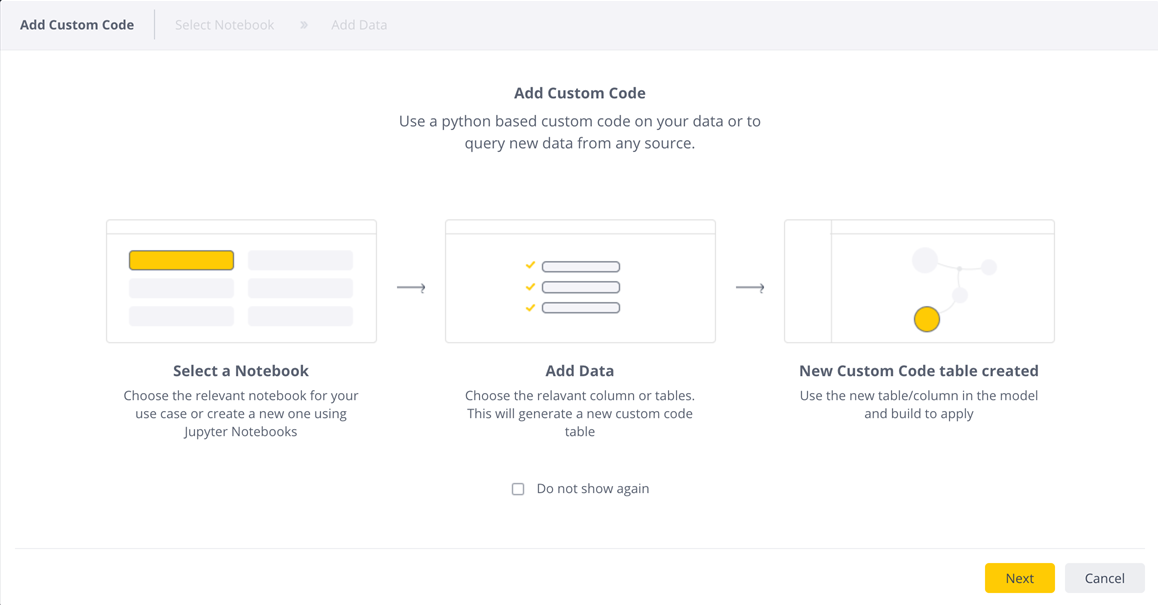
From your ElastiCube model, select +Custom > Add Custom Code.

-
The Add Custom Code screen is displayed. Click Next.

- Select a Notebook from the relevant category for your purposes: Getting Started, General Notebooks, AWS Services Examples, or Examples.
- If you select Create your own Notebook, begin configuring the manifest file for the Notebook. If you select another Notebook, click Edit notebook to configure the Notebook.
-
Enter the information for the Notebook.
-
Notebook name - Unique Notebook name
-
Description - The Notebook description to display in the Sisense Notebook Library
-
Group - Group notebooks together under Group Name, in Notebook Library, for instance "My Notebooks"
-
Icon - Enter a Base64 representation of an icon. If you leave this blank, it will display a Jupyter Notebook icon.
-
Timeout - Timeout in seconds
-
-
Click +Add Input to set the input parameters. Select an input type, enter the following parameters, and click Add:
- Input Title: The displayed name for the input typeInput
- ID: The ID used in the Notebook for this input type
- Column Type: Select the column type for this input type
- Send: Adds this input ID to the Notebook on a build
- DependsOn: Does the custom code table depend on the results of another table or column
- Primary: This table or column is the primary element upon which all results are based
-
Click +Add column, select a column type, enter a column name for the output column, and click Add.
-
Click Next and choose a table (or a column) from the +Choose a table (or +Choose a column) list and click Done. If you need to revise the manifest configuration, click Edit notebook.
Applying Custom Code to your ElastiCube Models
You can apply Custom Code on three different levels, on the column level, table level, or the ElastiCube model level. Custom Code is enabled or disabled from the different levels according to the availability of Notebooks relevant for that level. For example, Custom Code is available on the table level when there is a Notebook that has a single table in its additional parameters, as defined in the Notebook manifest.
Watch this video for more information:
Column Level
-
Hover over a column on the menu on the left side (nested under the table).
-
Click the table menu (
 ).
). -
Click Add Custom Code.
The Notebook Library is displayed.
Table Level
Table Level via UI
-
Hover over a table on the menu on the left side (nested under the table).
-
Click the table menu (
 ).
). -
Click Add Custom Code.
The Notebook Library is displayed.
Table Level via API
-
Create an ElastiCube.
-
Add a custom code dataset for the EC using
/datamodels/{datamodelId}/schema/datasetsand copy the oid from the response. -
Create a custom code table with the datamodel id and with the dataset id using
2.0 POST/datamodels/{datamodelId}/schema/datasets/{datasetId}/tables.
Note:
-
A custom code dataset can contain only one dataset.
-
Initialization can be done for debugging purposes. It is generally not needed, and by default should not be included. In order to perform initialization, enter
from init_sisense import sisense_connin the first cell. If initialization is being done (for debugging), it must be in the first cell (i.e., the test cell). Initializing in any other cell may lead to the following error:AttributeError:'NoneType' object has no attribute 'replace'.
Dataset Example
{
  "name": "custom_code_dataset",
  "type": "custom_code"
}
Table Example
{
  "name": "Custom Code table",
  "customCode": {
    "noteBookId": "create_data",
    "language": "Python",
    "codePath": "/work/storage_notebooks/custom_code_notebooks/examples/create_data/create_data.ipynb",
    "dependsOn": [],
    "mode": "Full",
    "cellsDisable": [
      0
    ],
    "additionalParameters": {},
    "serverUrl": "customcode:8888",
    "timeout": 900
  },
  "buildBehavior": {
    "type": "sync"
  },
  "columns": [
    {
      "name": "new_data",
      "type": 18,

      "indexed": false,
      "id": "new_data"
    }
  ]
}
Data Model
- In your data model, click + Custom > Add Custom Code.
The Notebook Library is displayed.
For All Levels
-
In the Notebook Library, select a Jupyter Notebook from the existing library.
-
Define the additional parameters to serve as input arguments to the Notebook. The Notebook runs as part of the build process.
Tip:
For more information, see Builds fail because libraries used in Custom Code tables are not installed on the Sisense Community site.