Security Settings
Last updated: June 28, 2026
| Tier | Deployment |
|
|
|
To update one or more Security settings:
- Click the Admin tab and, from the left-hand menu, click Security Settings, which is located under Security & Access.
- Update one or more of the following settings:
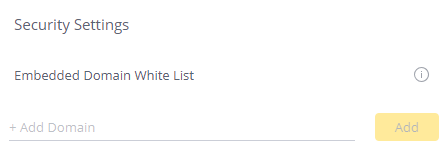
- Embedded Domain White List: You can define which domains can embed your dashboards into
iFrames on their site. This is useful for controlling where your dashboards can be embedded. In the Add
Domain field, enter each domain where your dashboards can be embedded and click Add . If you do not add
any domains, then your dashboards can be embedded into any site. The wildcard character "*" is supported, which represents the entire DNS subtree (for example *.sisense.com) or at least one sub/domain segment; it can be used either as part of a domain, or it can be used alone to refer to all domains / any site (which is the same as leaving the field empty). After adding a domain, your dashboards
can be embedded only in those domains.
Note:
Do not add the Sisense application origin (e.g.,
https://sisenseApp.com) to the list of allowed domains. Hide list of allowed domains: Limit the available embedded domains in the server response based on the ‘Referer’ or ‘Origin’ headers in the client app requests.
Note:
If the client app does not send ‘Referer’ or ‘Origin’ headers, enabling this option will cause requests to fail.
Limitation:
When Sisense is embedded using iFrame-based embedding (iFrame or Embed SDK), opening a Sisense URL in an iFrame from another Sisense URL embedded into a different domain will fail if the "Hide list of allowed domains" toggle is enabled. This means that Jump to Dashboard, Accordion dashboards, and similar dashboards will not open from a dashboard/widget embedded via iFrame when this toggle is enabled.
- Support Cross Site Cookies for Embedding: Select the value of the attribute Same-Site
that is added to cookies when accessing Sisense. Select None if you are embedding
Sisense or have implemented Sisense JS. In addition, Sisense recommends that you enable SSL when you
select None.
For more information about SSL, see Setting Up SSL for Sisense on Linux.Note:
Changing this setting will rotate the API token. Enable CHIPS for Iframe-based Embedding: Add a ‘Partitioned’ attribute to the auth cookies to leverage CHIPS, a privacy-focused solution which addresses Chrome third-party cookies deprecation. For more information, see Third-Party Cookies. Compatible with iframe-based embedding (IFrame and Embed SDK) only.
WARNING:
The CHIPS solution is not compatible with Sisense.js or Compose SDK.
- Session Management: You can choose which method to use for handling the expiration of your users' sessions: Cookie or Session Inactivity. For more information, see .
- Number of failed login attempts before lockout: Enter the number of times a user can fail to log in before they're locked out of Sisense .
- Lockout duration (minutes): Enter the number of minutes that a user is locked out of Sisense.
- Allow only users in imported groups to log in: When connected to Active Directory, Sisense creates a new user for your Active Directory users when they try to log in. If you want to limit which Active Directory users can create an account, toggle this switch to enabled. Only users of a Sisense Active Directory group can create an account and log in.
Allowed Target URLs: Specify the whitelisted target URLs for redirect (make sure to include the Sisense URL). If the target URL is not in the allowed list, the redirect will be blocked and users will see a Forbidden message on the SSO callback page. If the list remains empty, all domains will be allowed for redirect.
Enable impersonation for Admins: Located under Authentication Settings, beneath Enforce Two-Factor Authentication. Grants Admins the ability to log in as another user for troubleshooting and support. This toggle is ON by default; turn it off to prevent Admins, System Admins, and Tenant Admins from starting impersonation sessions across the deployment. When disabled, every impersonation request is rejected. Changing this setting takes effect immediately and does not require a redeploy. Impersonation remains governed by the role ladder, a required reason, rate limits, and session time limits regardless of this toggle. For more information, see Managing Users.
Important:Only upload files from sources that you trust.
- Embedded Domain White List: You can define which domains can embed your dashboards into
iFrames on their site. This is useful for controlling where your dashboards can be embedded. In the Add
Domain field, enter each domain where your dashboards can be embedded and click Add . If you do not add
any domains, then your dashboards can be embedded into any site. The wildcard character "*" is supported, which represents the entire DNS subtree (for example *.sisense.com) or at least one sub/domain segment; it can be used either as part of a domain, or it can be used alone to refer to all domains / any site (which is the same as leaving the field empty). After adding a domain, your dashboards
can be embedded only in those domains.
- Click Save to update your system settings.
Allowed Domains for Embedded Dashboards
If you are embedding a dashboard on your website, you can control which domains can embed the dashboard by adding allowed domains to a whitelist.
Allowed Domains enable you to limit where your embedded dashboards can be viewed, even if someone takes the embed code from your page.
When you add a domain to the whitelist, Sisense automatically includes the domain in the frame-ancestors directive of the Content Security Policy response header of the dashboard web page.
For example:
Content-Security-Policy: frame-ancestors 'self' test.sisense.com
If you are browsing with Internet Explorer, you do not need to fill in Embedded Domains White List.
To add your domain to a white list:
- In the Admin page, select Security Settings.
- Under Security Settings, enter your domain (and the port if not the default).
- Click Add.
- Click Save.
Content-Security-Policy
In Sisense V8.2.1 for Linux, following changes to the content-security-policy, the add-ons listed below did not work as expected as images and iFrames were not allowed.
To allow these add-ons to use images and iFrames, you need to modify the content-security-policy to allow domains where your resources are directed to. For example, if your resources such as an image were hosted on sisense.com, you would need to allow this domain so your Viewers could see the images in your add-on.
To modify the content-secutity-policy:
- Access the Configuration Manager.
- Expand the Content Security Policy section.
- Enable Custom Content Security Policy.
- In the fields, Frames Domains and Images Domains, enter the domains where your iFrames and images are pointing to so they can be leveraged in your add-ons. You can use wildcards such as * to allow multiple or unknown domains. For more information about wildcards, Source List Reference here.
- Click Save.