Optional Security Hardening for Web Pages
Last updated: June 10, 2026
| Tier | Deployment |
|
|
Below are additional security options that can be applied for hardening the security of Sisense web pages for your needs.
Audit Log
Sisense provides audit logs. They can be enabled according to your company security policies. For additional information, see Audit Logs.
Content-Security-Policy
In Sisense V8.2.1 for Linux, following changes to the content-security-policy, the add-ons listed below did not work as expected as images and iFrames were not allowed.
To allow these add-ons to use images and iFrames, you need to modify the content-security-policy to allow domains where your resources are directed to. For example, if your resources such as an image were hosted on sisense.com, you would need to allow this domain so your Viewers could see the images in your add-on.
To modify the content-secutity-policy:
- Access the Configuration Manager.
- Expand the Content Security Policy section.
- Enable Custom Content Security Policy.
If you enable this option, click Save at the bottom of the page and click OK to apply the changes and restart the relevant Sisense services.
- In the fields, Frames Domains and Images Domains, enter the domains where your iFrames and images are pointing to so they can be leveraged in your add-ons. You can use wildcards such as * to allow multiple or unknown domains. For more information about wildcards, Source List Reference here.
- Click Save to save your changes.
Cookie Security
By default, Sisense web pages have cookies that contain a secureFlag when SSL is set on the Sisense server. This flag instructs the browser that the cookie should only be returned to the Sisense Web Application over encrypted connections (HTTPS).
For more information about enabling SSL, see Setting Up SSL for Sisense on Linux.
Cross-Site Request Forgery (CSRF)
CSRF is a type of exploit that allows attackers to perform unauthorized actions on behalf of a user that the web application trusts. For example, if you are logged into Sisense, and open another web page or email provided by the attacker, this can allow the attacker to exploit your authenticated session in Sisense and perform unwanted actions.
To prevent CRSF attacks on Sisense:
- In your browser, open the Configuration Manager located at http://localhost:3030.
- Toggle the CSRF Protection switch to Enabled.
If you enable CSRF Protection, you cannot use SisenseJS, Sisense Mobile, or Sisense embedded in iFrames. To use CSRF Protection with your add-ons, see Cross-Site Request Forgery.
When CSRF Protection is enabled, an additional cookie is added for validation. If the domains of the parent application and Sisense are the same or a proxy is being used, then that cookie will be available from the parent application side and Sisense JS will be available to use. Otherwise, that cookie will not be available and Sisense JS will not be available as well.
Account Lockout Thresholds
To prevent brute-force attacks, you can configure account lockout thresholds. For more information, see Account Lockout Thresholds.
Strict Transport Security
HTTP Strict Transport Security (HSTS) is a method for preventing any communications from being sent over HTTP to the specified domain and allows only communication over HTTPS. This is useful for preventing man-in-the-middle attacks or users with invalid certificates from accessing your dashboards. This is automatically applied when you enable SSL for the Sisense.
Allowed Domains for Embedded Dashboards
If you are embedding a dashboard on your website, you can control which domains can embed the dashboard by adding allowed domains to a whitelist.
Allowed Domains enable you to limit where your embedded dashboards can be viewed, even if someone takes the embed code from your page.
When you add a domain to the whitelist, Sisense automatically includes the domain in the frame-ancestors directive of the Content Security Policy response header of the dashboard web page.
For example:
Content-Security-Policy: frame-ancestors 'self' test.sisense.com
If you are browsing with Internet Explorer, you do not need to fill in Embedded Domains White List.
To add your domain to a white list:
- In the Admin page, select Security Settings.
- Under Security Settings, enter your domain (and the port if not the default).
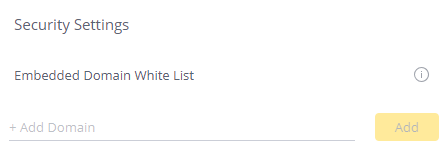
- Click Add.
- Click Save.