Managing Git Integration Projects
This section covers:
- Creating a New Project
- Connecting to a Remote
- Managing Users' Access
- Modifying Existing Project Properties
- Deleting a Project
- Using the Project List
A Sisense project is the Sisense representation of a local repository such as you would create when running the git init command on your laptop or PC, (see Getting a Git Repository). Essentially, a project is a bucket containing JSON representations of Sisense assets that you want to track and be able to modify.
Git Integration project folders
As part of the Git Integration feature, a dedicated projects directory was added in the Sisense file system: /app/explore/files/git/
For each project you will find a corresponding 'physical' folder in this directory. For example: /app/explore/files/git/63443a25ef9b340012918f68/
Concurrency locking
Because the project repositories are all local to the Sisense server (in /app/explore/files/git/) this could lead to problems if multiple users were to try to make updates in the same project at the same time. The Git Integration feature uses concurrency locks to provide protection against these types of issues. For more information see Concurrency Locks.
Creating a New Project
New projects can only be created by Admins, (which includes the Super Admin and Admin user roles).
Note:
While Git Integration is available for the main tenant, it does not yet support organization tenants. For more information about Sisense self-contained multitenancy see Self-contained Multitenancy.
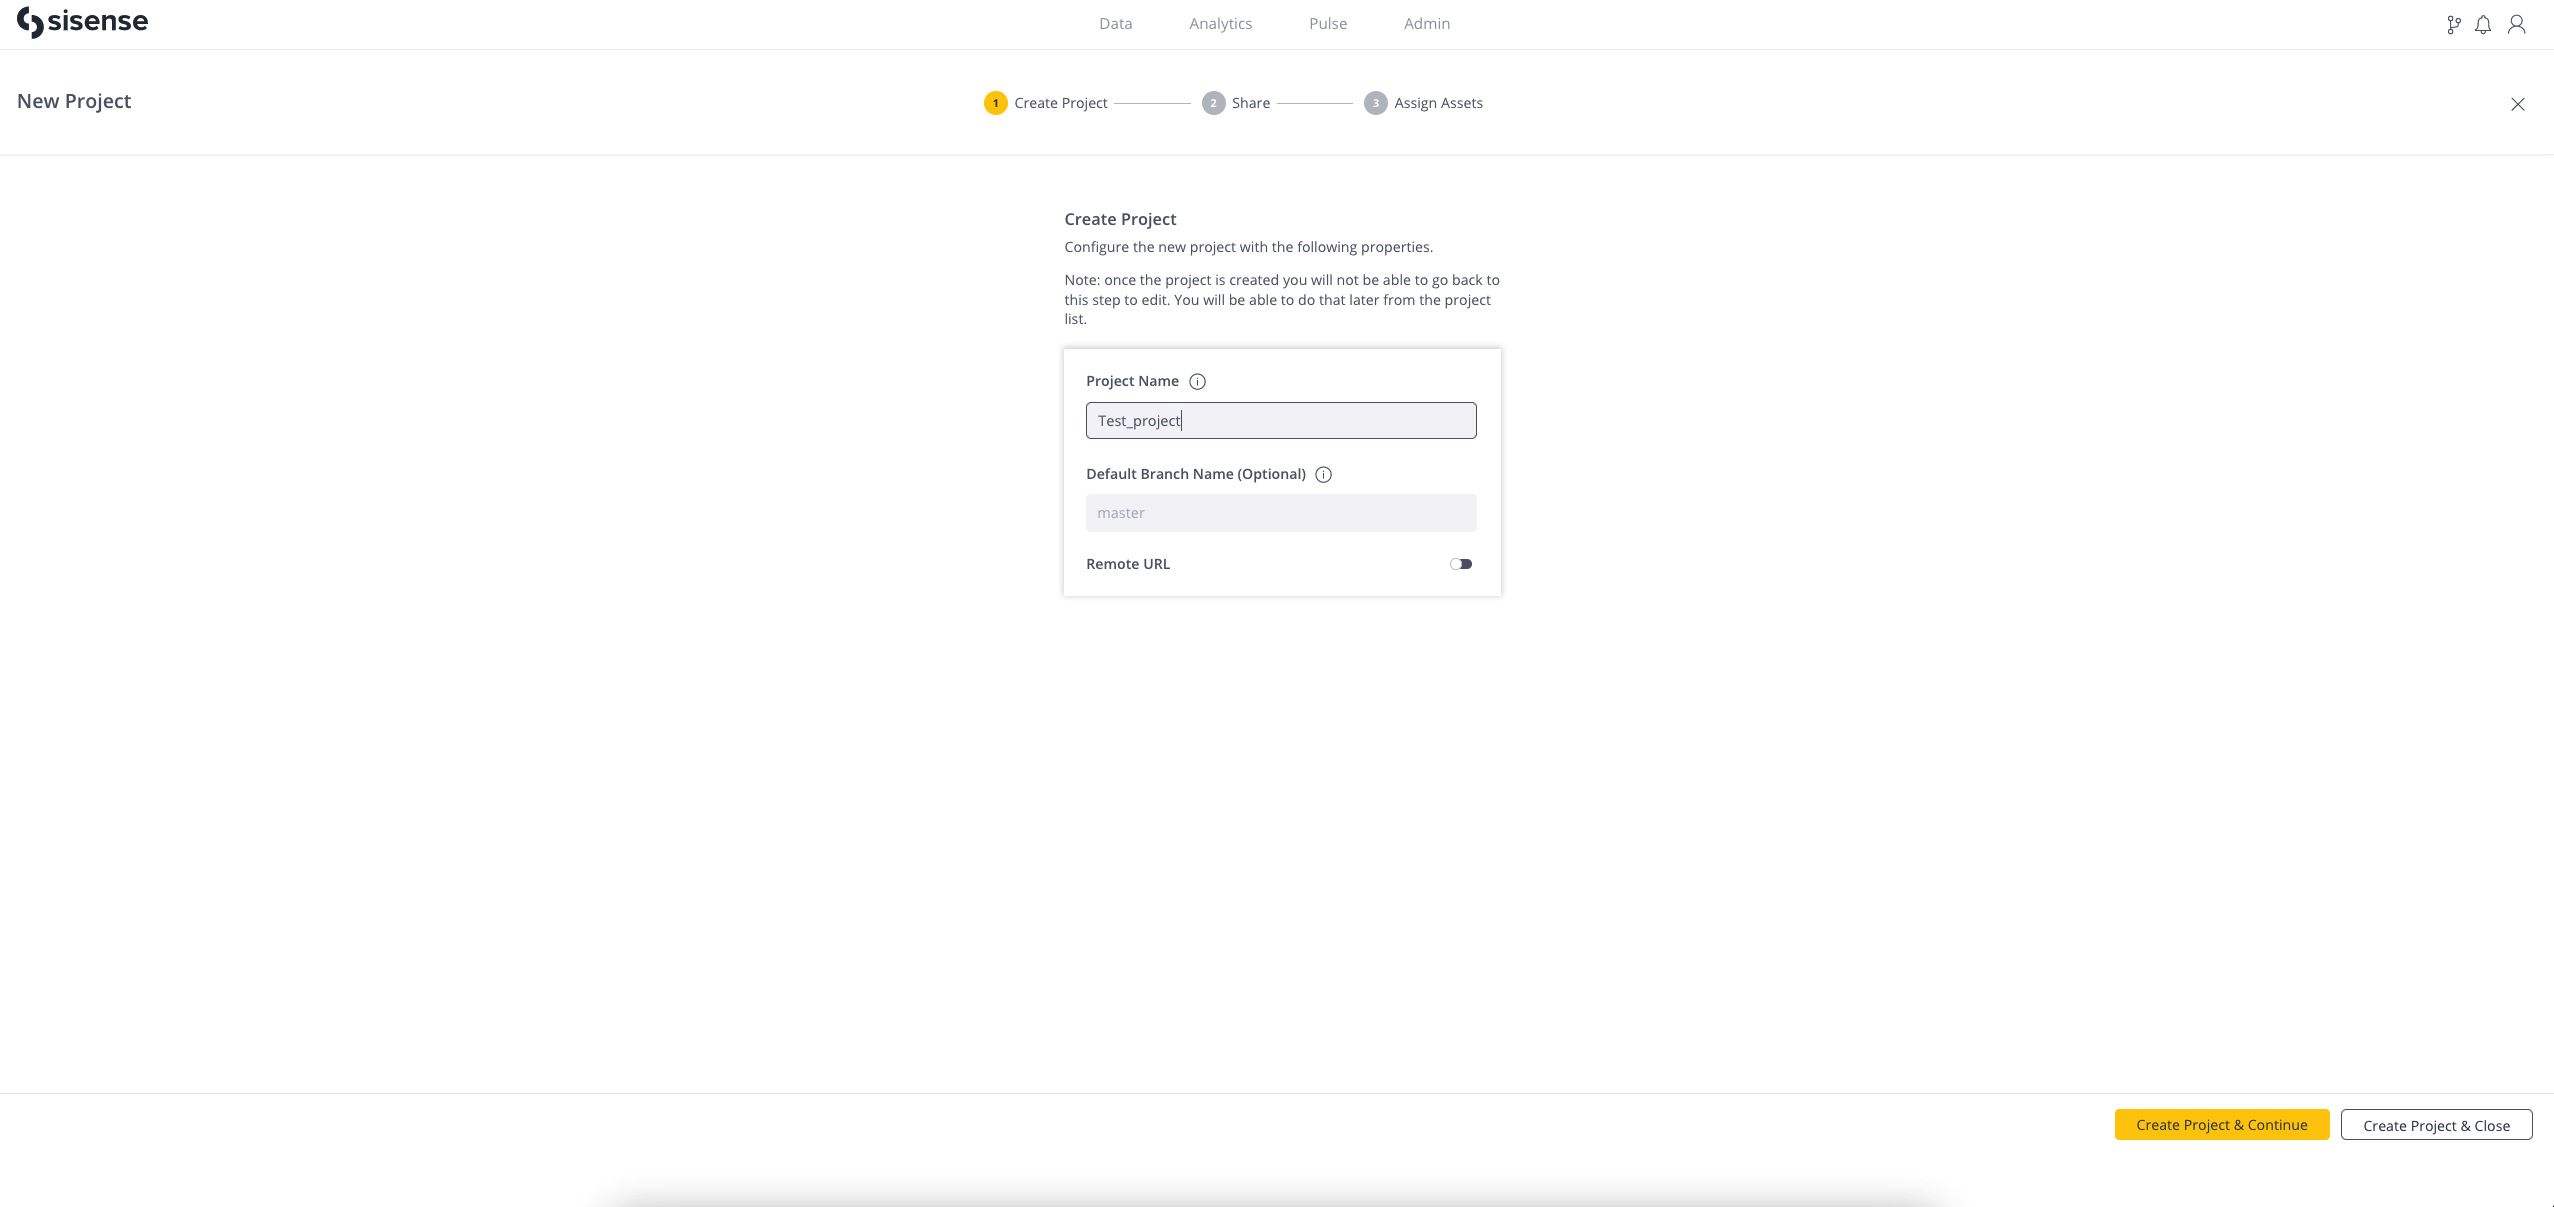
To create a new project use the new project wizard, which is opened via the [ + New Project ] button on the projects page (/app/projects). For non-admin users (Data Admin, Data Designer, Dashboard Designer) the [ + New Project ] button is not available.
Creating a new project includes 3 steps:
- Create Project
- Share
- Assign assets
The first step is essential for creating a new project. The second and third steps are optional, and can be done later after a project already exists.
Fields in the Create Project Wizard
- Name- Defines the name of your project. The name should reflect the purpose or assets that will be tracked in the project so that you can easily find it in the list of projects:
- Required field
- Make sure it is unique
- No special characters or spaces are allowed
- Default Branch Name- Defines the name of the first branch created with a new project:
- Optional field
- Default value - 'master'
- Should not contain spaces
- Remote URL- Enables connecting this 'local' Sisense project with a remote repository, such as GitHub, GitLab, BitBucket, Azure, etc.:
- Optional step and field
Connecting to a Remote
Connecting to a remote enables centralized synchronization of the work, collaborative review of the changes via the merge requests, and the inclusion of Sisense into the existing CI/CD pipeline of the customer.
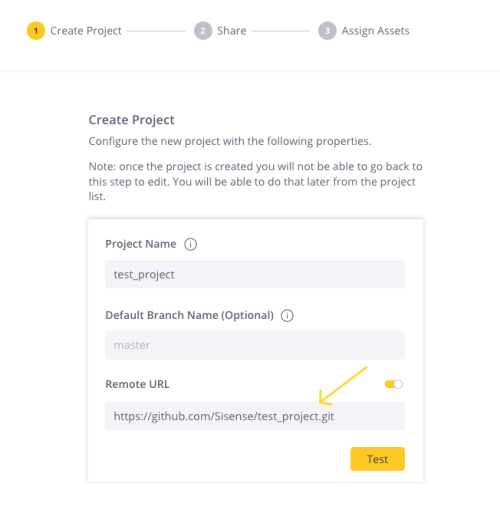
Enable the Remote URL toggle to open the field for providing the link to the remote repository.
HTTPS authentication is the only type of authentication that is currently supported.
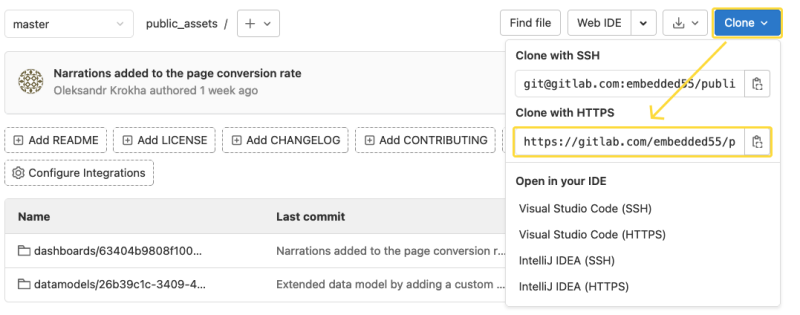
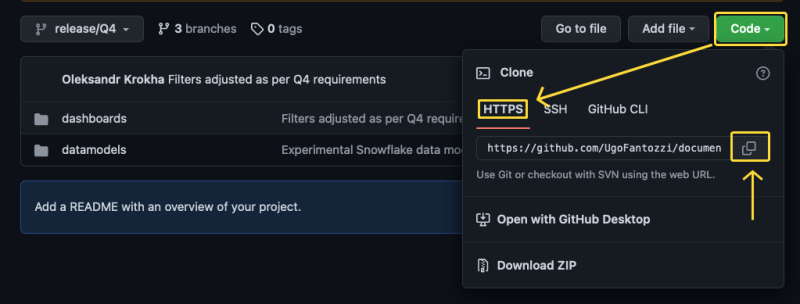
A valid Git link can be obtained directly from the chosen remote repository.
For more information, see:
- About remote repositories - GitHub Docs
- Git on the command line | GitLab
- Clone an existing Git repo - Azure Repos
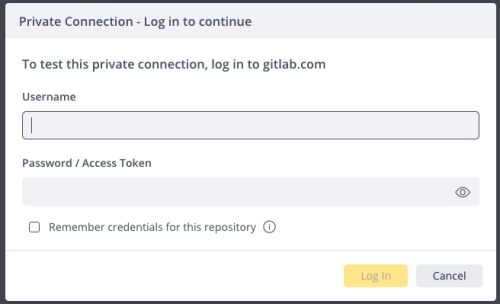
Verifying the connection between the Sisense project and the remote repository is required for connecting. Click [ Test ] to proceed.
In the modal dialog for a new connection enter:
- Your login to the account at the remote repository
- The password or access token
Notes:
-
Some of the remote Git hosting vendors do not accept user passwords and require an access token, (for example, Creating a personal access token - GitHub Docs). In case of token utilization the Sisense account user email can be used.
-
For internal or on-premises git servers the Sisense instance must have network access to the git server.
The Sisense Git project can be connected to the remote later via the settings menu of this project in the list of all projects. (See Modifying Existing Project Properties, below.)
Saving Credentials
Interaction with the remote repository requires the user to have a connection set up. To save the user credentials for a project mark "Remember credentials for this repository" so they do not have to be entered for each operation.
Each user has to enter their own credentials to the remote. If they are missing, a common modal dialog for connecting to the remote will appear with the user's first remote-related operation in the project, (see Working with Git Integration Projects). If a project is deleted, or the remote URL for a project is changed, the credentials will be deleted.
Managing Users' Access
Admins (meaning the Super Admin and Admin user roles) can modify a project's access permissions at any time after the project has been created.
When users are added to a project they will have full access to the repository, and will be able to perform all operations such as commit, push/pull, or adding and removing assets from the project, (see Working with Git Integration Projects). You should only add users that are expected to interact with the project repository itself.
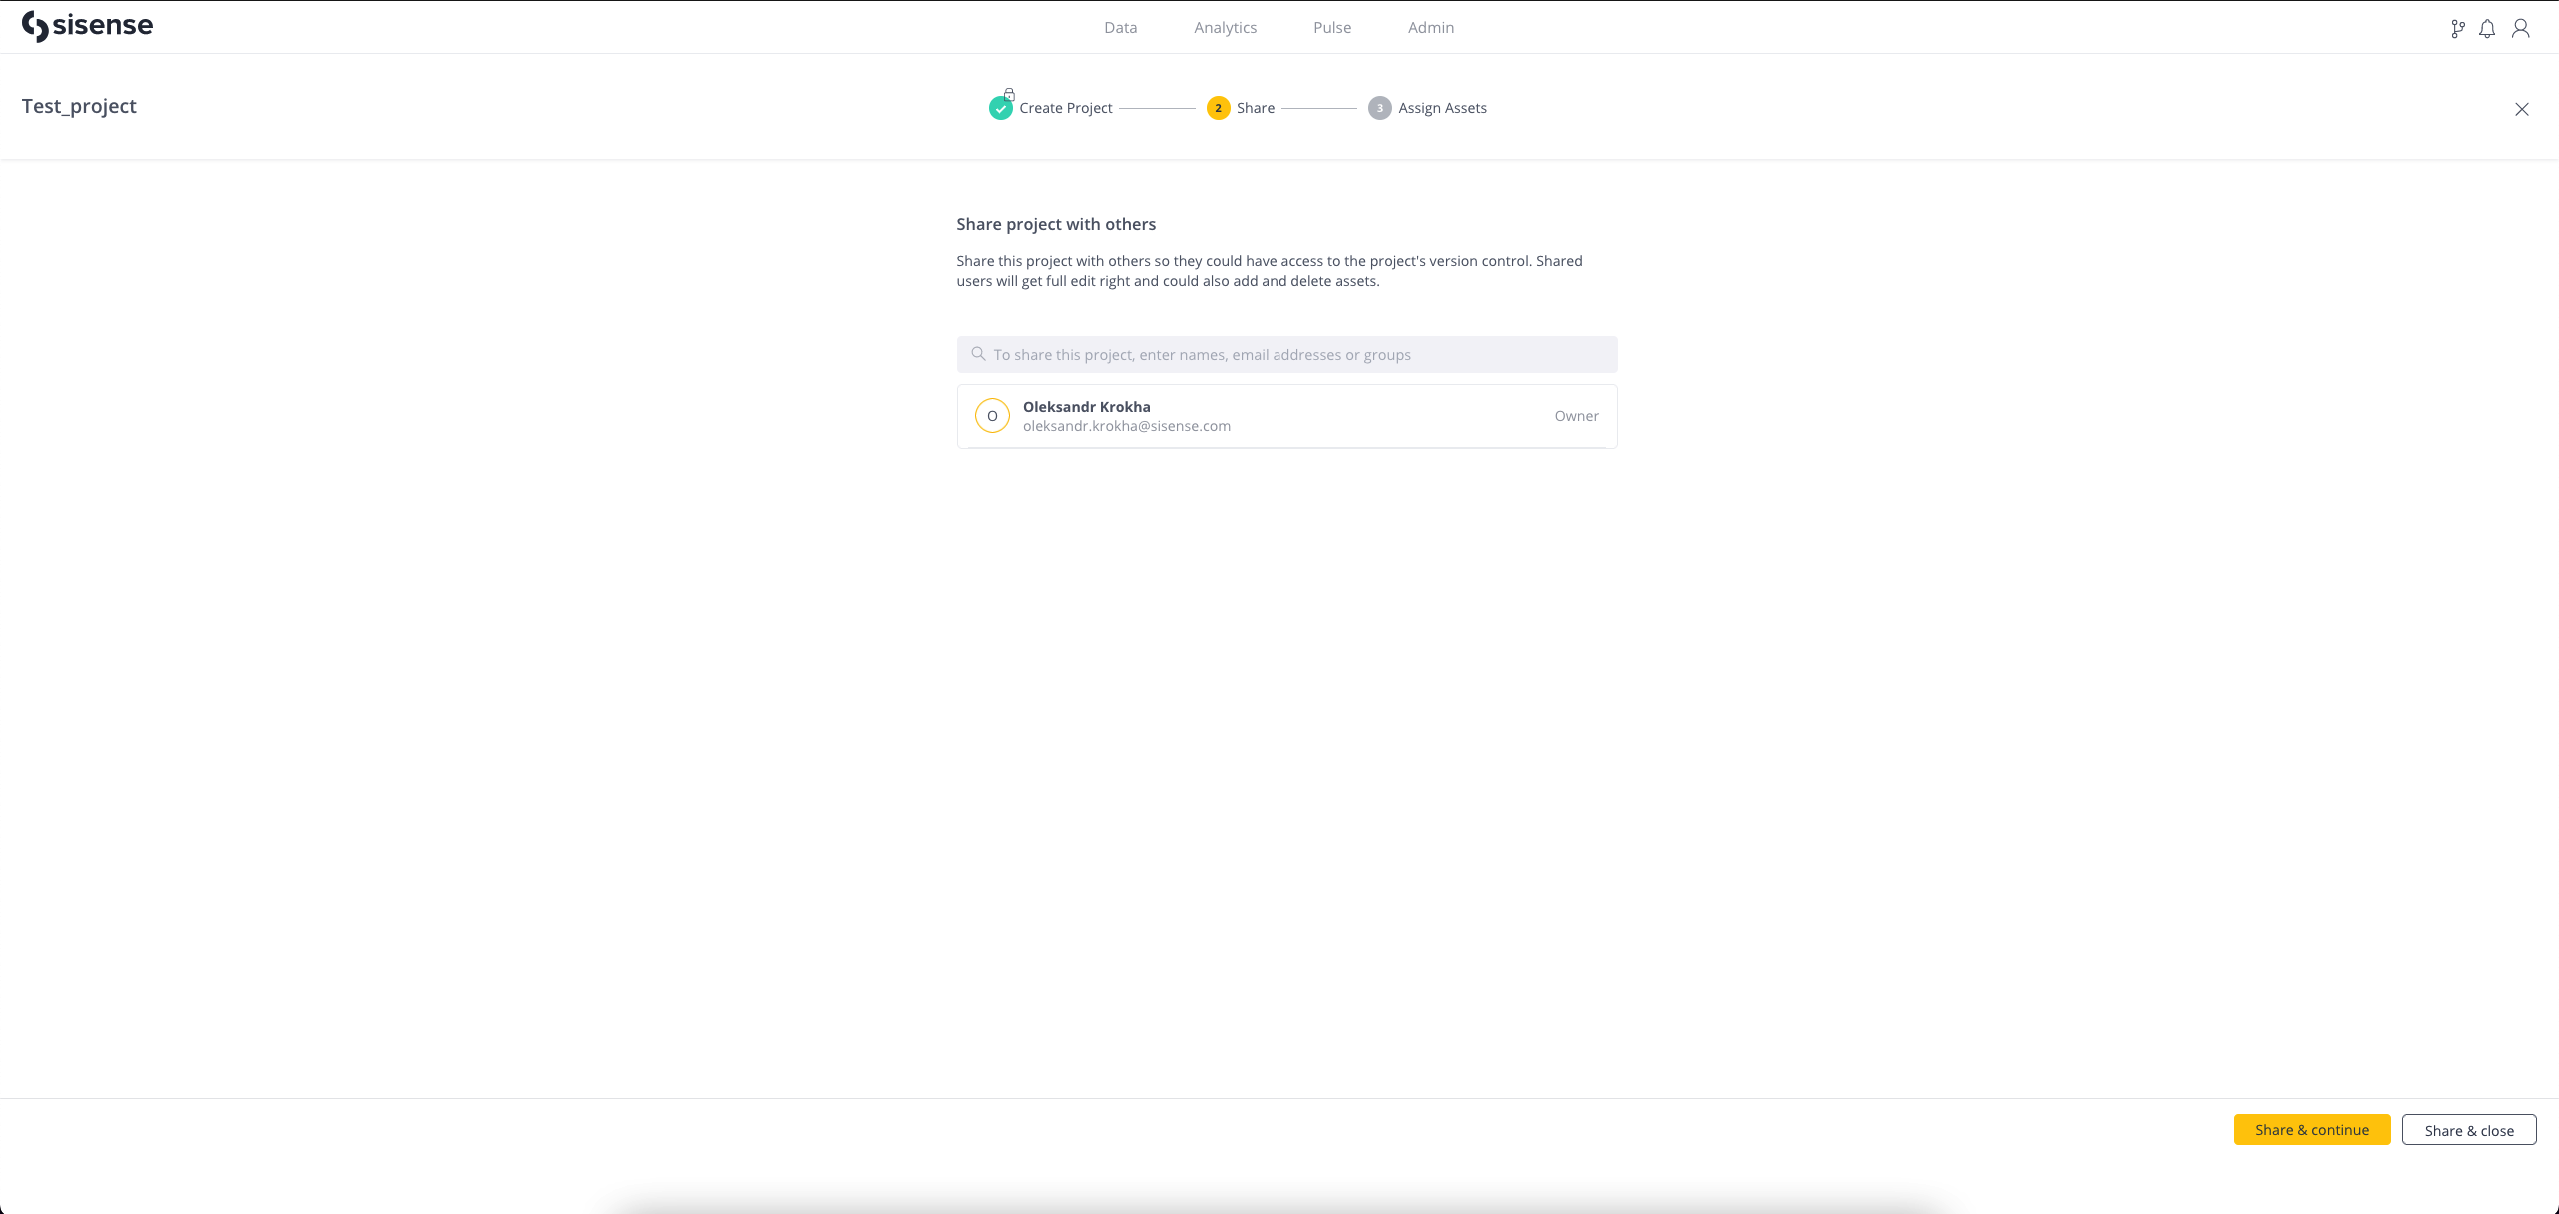
Admins can share Git projects in the second step of the project wizard, or later via the settings menu of the project in the list of all projects. From either location it is possible to grant or revoke a user's access by simply adding or removing them as contributors in the list and clicking [ Share ].
Sharing projects from the project wizard
Sharing projects from the projects list
To share projects from the projects list page find the project you wish to modify, click the 3-dot menu icon, and select [ Share ] from the context menu.
Note:
Affiliation with a project/repository does not influence permissions to access the assets (dashboards, data models, etc.) themselves. That is managed by dashboard/data model sharing which is separate from the project's permissions. Anyone with access to the project/repository will be able to see the JSON representation, but may not be able to access the asset itself in the application if the dashboard or data model is not shared with them.
Modifying Existing Project Properties
Some of the project properties can be modified after a project has been created. To do this, go to the project list page, browse to the required project, click the 3-dot menu, and select Settings from the context menu.
The options available for modification depend on the user role:
- Admins (Super Admin, Admin) can:
- Change the project name
- Connect/disconnect to the remote repository
- Change the link to the remote repository
- Update their own credentials to the remote
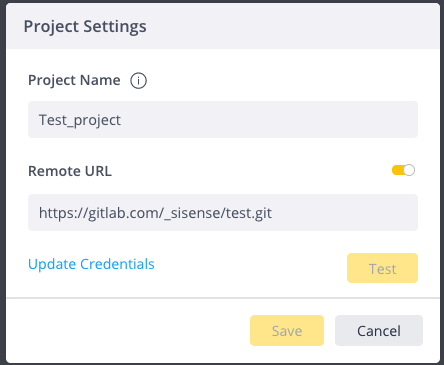
- Non-Admins (Data Admin, Data Designer, Dashboard Designer) can only update their own credentials to the remote repository. The rest of the options are not available.
Setting the Remote URL in existing projects
When setting or changing the Remote URL property (to the remote repository) for a project that already has a commit history, make sure that the history of the Sisense project and the history of the remote do not conflict. Otherwise, you may be unable to interact with the remote repository due to the unrelated history error, fatal: refusing to merge unrelated histories. The best approach is to change the Remote URL to connect the existing Sisense project to a blank remote repository.
See Handling Divergent Branches with Unrelated History for more information.
Deleting a Project
Deleting a Sisense project removes all of its content from the file system but does not affect the current copy of the assets in the Sisense application. (For more information, see Asset Translation and Management.) In other words, it removes all of the version control histories of the tracked assets, but does not affect the copy of the asset that is available in the Sisense application.
When a project is deleted:
- The folder in the file system (project repository) for this project is removed.
- New changes in the assets of the deleted project are not tracked.
- Assets assigned to the deleted projects are not affected in the Sisense application. The Sisense application copy of the asset remains in its latest state.
- Assets that were in the deleted project are now available to be included in other projects.
-
Deleting a Sisense Git project does not affect the connected remote repository (e.g., GitHub, GitLab, Bitbucket, Azure, etc.); remote repositories must be managed directly within their respective platforms by users with the appropriate permissions.
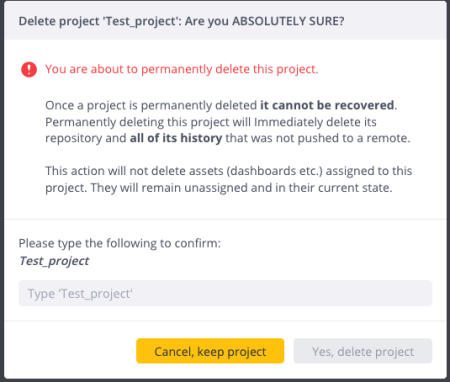
The delete operation is only available to Admins. As there is no possibility to undo this operation the admin needs to type in the name of the project to confirm.
Using the Project List
For quick browsing and navigation in the list of existing projects users can search, sort, and filter projects according to their needs.
The default sorting approach is:
- Projects with pending approval requests are located at the very top of the list (if exists). See Working with Git Integration Projects.
- With commits (newer at top, then older)
- Rest of the projects as per the default approach ORDER BY Last Committed DESC:
- With commits (newer at top, then older)
- No commits yet
Search makes it possible to find all of the projects available (for the currently logged in user) that match the entered query in any position of the project name. Search uses the same logic as the LIKE%% operator in SQL statements. Search is not case sensitive.
Marking as Favorite
The Favorite option enables each user to mark their top-used projects and access them in one click.
A project can be marked as a favorite by clicking on the star icon near the project name. Project's favorites are user specific and do not impact other users on the system.
Once a project is marked as a favorite the star icon changes color and such projects are listed after applying the quick filter "Favorites."

