Connecting to Salesforce
Last updated: June 10, 2026
| Tier | Deployment |
|
|
|
Sisense only supports Salesforce Enterprise and above. Sisense enables easy and quick access to databases, tables and
views contained within Salesforce. The steps below describe how to connect to this type of data source.
Prior to working with the connector, the Salesforce admin must white-list the Sisense domain in Salesforce.
Note:
- For the list of supported connectors, see Data Source Connectors.
- For Linux, if you use Salesforce on the desktop ElastiCube Manager, you should migrate only after upgrading to Sisense Linux V8.2.1 as the data model naming convention is different.
Importing Salesforce Data
Salesforce can be customized in various ways, therefore it's recommend to first review your deployment, and understand in which entity (account, contact etc.) and how the required data is stored. Once understood, connect to Salesforce and import a few tables to review the data. For a general outline of Salesforce entities, see Salesforce Schema and Table Description.
To import Salesforce data:
- In the Data page, open an ElastiCube or click
 to create a new ElastiCube.
 - In the Model Editor, click
 . The Choose Connector window is displayed:
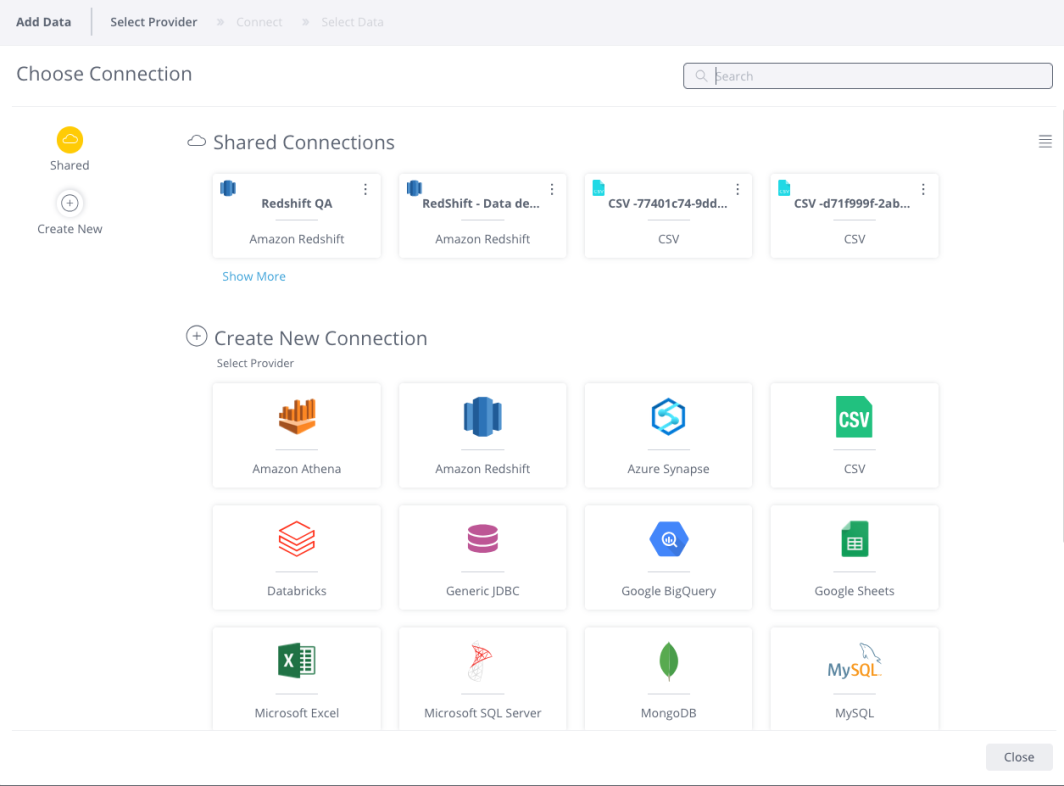
-
Choose an available managed connection, or create a new connection, for Salesforce. The Salesforce area is displayed.
-
Under Basic, enter the following details:
-
Use Sandbox: Select if you are connecting to Salesforce Sandbox environment. If you need to connect to your Salesforce Sandbox environment, read this article in the support forum.
-
User Name: Enter your Salesforce user name.
-
Password: Enter your Salesforce password.
-
Security Token: Enter your Salesforce security token. See Importing Salesforce Data to create a token.
-
Advanced: (Optionally) Enter additional configuration options by appending key-value pairs to the connection string (e.g., Timeout=60;). For a full list of connection string options, click here.
Alternatively, if you want to connect to Salesforce with a JDBC connection string, select Advanced and enter additional configuration options by appending key-value pairs to the connection string, for example:
jdbc:salesforce:User=XXXX@XXX.com;Password=XXXXXXX;Security Token=XXXXXXXXXXXXXXXXXXXXXXXX;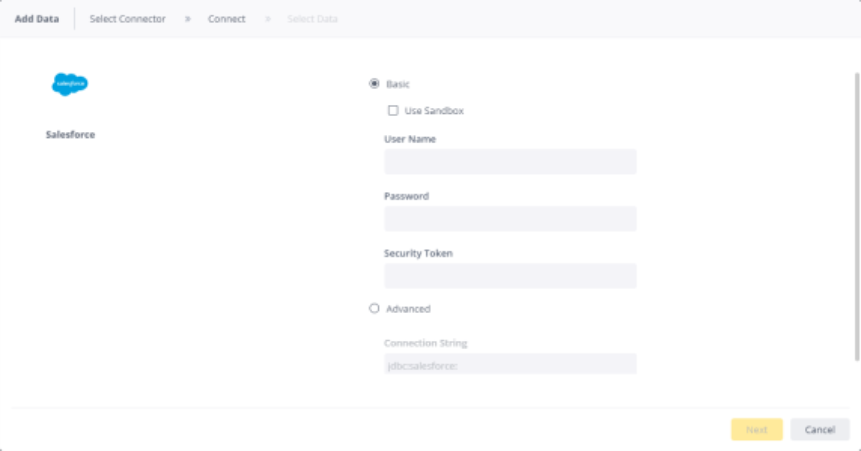
-
- Click Next. All tables and views associated with Salesforce are displayed.
- From the Tables list, select the relevant table or view you want to work with. You can click
 next to the relevant table or
view to see a preview of the data inside it. When you select the table or view, two new options are displayed at the
bottom of the list, Import Relationships and Add Custom Import SQL.
next to the relevant table or
view to see a preview of the data inside it. When you select the table or view, two new options are displayed at the
bottom of the list, Import Relationships and Add Custom Import SQL. - (Optional) By default, existing relationships between tables are automatically replicated in the ElastiCube. You can disable this by toggling the Import Relationships switch.
- (Optional) Click + to customize the data you want to import with SQL. See Importing Data with Custom Queries.
- After you have selected all the relevant tables, click Done. The tables are added to your schema.
Note:
Salesforce objects contain many columns, most of them are quite large and do not serve any analytical purpose. To avoid overloading the model, Sisense does not import them by default when the tables are added to the schema. Sisense does not import columns where the data size is larger than 80 except for [Account].[Name] and [Lead].[Name].
Generating a Security Token
Before getting started, you will need a Salesforce Security Token.
To generate a token:
- Open Salesforce and click Setup>My Personal Information>Reset Security Token.
- Click the button labeled Reset Security Token. The token will be sent to your email address.
Out-of-Memory Issues
When building an ElastiCube with this connector, you might receive an "out of memory" error. To add more memory, see Troubleshooting Performance Issues.