Integrating Active Directory
Last updated: June 10, 2026
| Tier | Deployment |
|
|
Sisense supports integrating Active Directory users and groups with your current Sisense users, so that you can share dashboards and email reports with any of your users. This works in parallel with Sisense's existing User Management, so you can continue to add users and user groups that are not part of the Active Directory domain.
Note:
Sisense Active Directory integration only supports Microsoft Active Directory. If you wish to integrate with other LDAP providers, look into SAML or OIDC SSO integration. If your LDAP provider supports neither of the SSO protocols, reach out to your Customer Success Manager to discuss custom integration options.
To enable Sisense to identify your Active Directory users, import your Active Directory users and groups into Sisense . When you import an Active Directory user, Sisense automatically creates a Sisense user. When you import an Active Directory group, Sisense does not automatically create a Sisense user for each member. The first time a member of an Active Directory group logs in, Sisense automatically creates a Sisense user. Active Directory users that do not log in, are not assigned a Sisense user until their first login.
For secure connections to Active Directory, Sisense supports LDAP-S (LDAP over SSL), which encrypts communication between Sisense and your Active Directory. If your Active Directory supports SSL, you can upload your PFX certificate and PFX password for each Active Directory domain while defining your Active Directory settings in Sisense . PFX files contain the public key file (SSL certificate file) and the associated private key file in a single file. These files are generated and provided by you.
You can also enable an LDAP connection over SSL (LDAPS) without a Private Key (PFX).
This topic describes how to configure Active Directory in Sisense , and how to import users and user groups from Active Directory.
Adding an Active Directory Domain to Sisense
From the Active Directory page, you can add Active Directory domains to your Sisense configuration. Each Active Directory domain you add to your Sisense configuration is added to the Active Directory list displayed in the Active Directory page. The first time you open the Active Directory page, the Add Domain link is displayed, which you can click to begin adding Active Directory domains.
After you have added your first Active Directory domain, it is displayed in the Active Directory list.
From the Active Directory list, you can add additional Active Directory domains. Each Active Directory domain you add
to Sisense enables you to share your dashboards and reports with users from any of the domains as well as Sisense
users not part of an Active Directory.
You can filter the list of the Active Directory domains by entering the name of the relevant domain in the
Search field.
To add an Active Directory:
- Click the Admin tab, and search for and select Active Directory, which is located under User Management.
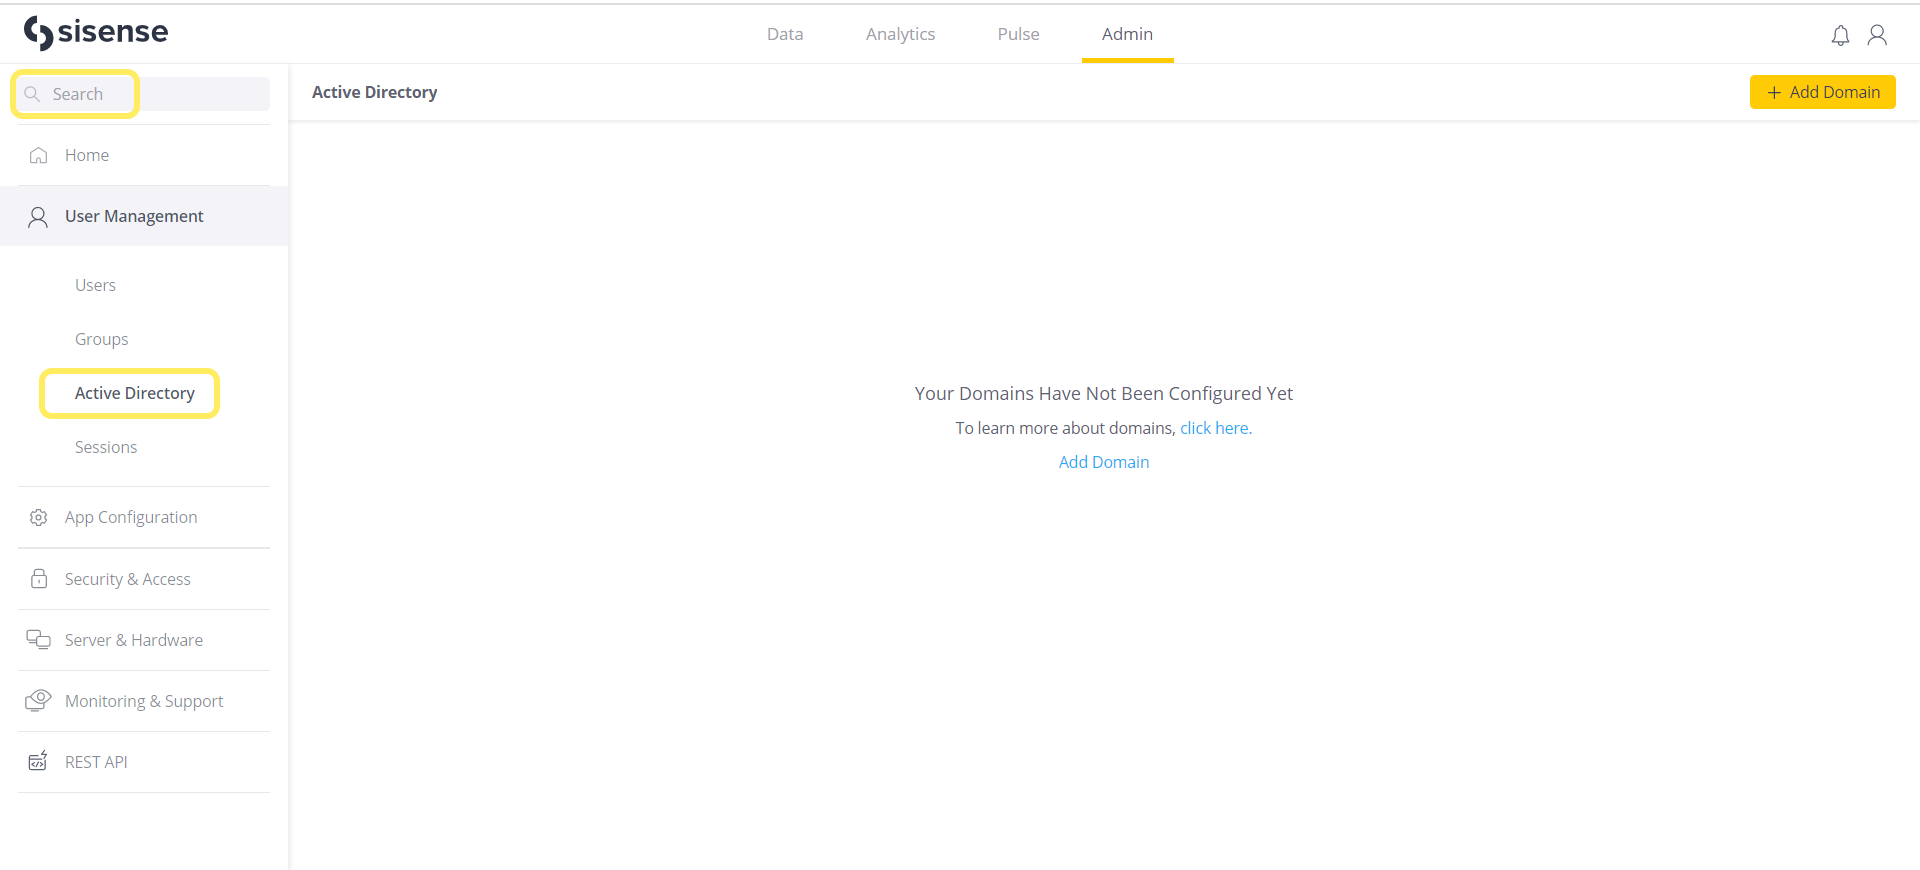
- In Active Directory, click Add Domain.
- In the Add Domain window, fill in the Active Directory configuration fields to point to your
Active Directory instance:
- Name: The name of your Active Directory domain. This name is used to locate your Active Directory domain in Sisense when you have multiple domains.
- Connection String: The full path to your Active Directory domain. Example: ldap://dc.domain.com (Or ldaps://dc.domain.com for secure connections)
- Base DN: The Active Directory location from where a server searches for users. Enter the domain
by its distinguished name (DN) with its domain components (DC) connected by commas.
For example: For the domain domain.sisense.test, use DC=domain,DC=sisense,DC=test.Note:
If you have a hierarchy of user groups in your organization, you can define the hierarchy in your string as follows: If your domain is domain.sisense.com/OU1/OU2, then use OU=OU2, OU=OU1,DC=domain,DC=sisense,DC=com. Only users and user groups from OU2 are available and users/groups under OU1 are unavailable. - Username: Enter the username with domain. Example: domain\username
- Password: Enter the password for your Active Directory instance.
- Sync data every: Enter how often, in milliseconds; Sisense automatically synchronizes with the users and groups in this Active Directory domain, checking the USNChanged parameter periodically for changes.
- Force Sync on Active Directory Connection: This configuration performs a full sync with the active directory server upon each sync. It is recommended to use when your active directory is utilizing nested groups that are not reflected in the Sisense application. This type of sync requires more time to be completed, so ensure that you allow enough time between sync cycles for optimal performance. The default value of this configuration is off.
- SSL Enabled: Select to enable a secure connection to your Active Directory. When you select
SSL Enabled, the PFX Upload area and PFX Password field are
displayed. In the PFX Upload area, drag the PFX file into the browser or click Browse and
navigate to the file. Enter the password you received once your PFX file was generated,to the PFX Password field.
- If you want to enable SSL without a Private Key, select SSL Enabled and click Save.
- Add your LDAPS public certificate to Sisense intermediate certificate. See the Troubleshooting
section in Migrating Dashboards Across Environments to see how to set up an intermediate certificate.
Note:
The PFX certificate and password are required to set up LDAP. If the intermediate certificate or the PFX are missing or invalid, the following error message is displayed:Ldaps certificate is misconfigured
- Click Test to verify that your configuration successfully connects to your Active Directory domain and click Save.
Editing Active Directory Domain Settings
To edit an Active Directory domain:
- From the Active Directory list, select
 for the Active Directory settings you want to edit.
 - In the Edit Active Directory window, edit the relevant fields and click Save.
Disabling an Active Directory Domain
You can disable Active Directory domains in Sisense.
An Active Directory domain that has been disabled is still displayed in the Active Directory list, however, users from this domain will not be able to log in to Sisense , and you will not be able to share dashboards or reports with them.
Disabled Active Directory domains have the status Disabled in the Status column in the Active Directory list.
To disable an Active Directory domain:
- From the Active Directory list, select
 > Disable for the Active Directory domain you
want to disable. The Active Directory domain is disabled.
> Disable for the Active Directory domain you
want to disable. The Active Directory domain is disabled.
You can enable the Active Directory domain by selecting > Enable.
Deleting an Active Directory
You can delete an Active Directory domain from your configuration. When you delete an Active Directory domain, the users included in that domain are no longer displayed when sharing dashboards or reports. Deleted Active Directory domains cannot be restored, however you can add the Active Directory domain again from the Active Directory page.
To delete an Active Directory domain:
- From the Active Directory list, select
 for the Active Directory settings you want to delete.
 - Click Delete. The Active Directory domain settings are removed from Sisense .
Adding a User from Active Directory
Once a connection with Active Directory has been established, an additional Import from External Server option is added to the Add Users button in the User tab.
The user's username and email will be added from Active Directory.
You can add a user from Active Directory, even if you have not imported that user's user group from Active Directory.
See Managing Users for general information about working with users/user groups in Sisense .
Associating a Sisense User with an Active Directory User
Once a connection with Active Directory has been established, you can associate Sisense users to your Active Directory users in the User tab. Associating a Sisense user with an Active Directory allows you to manage your Sisense users from Active Directory. For example, after associating your users, if you need to delete a user, you can remove them from Active Directory and they will no longer be able to access Sisense . Another example is if you have an Active Directory user and a Sisense user with their own dashboards or ElastiCube s, you can associate the accounts so you do not need to create a new Active Directory user for your Sisense account.
To associate a Sisense user:
- Click the Admin tab, and search for and select Users, which is located under User Management.
.png)
- Click
 to edit the relevant Sisense user.
 - If Active Directory is not enabled, toggle the switch to enable it.
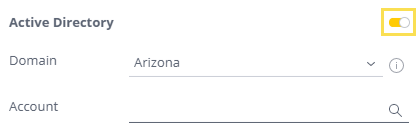
- Select the relevant Active Directory domain and locate your Active Directory user.
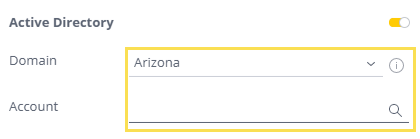
- An auto-complete list is displayed showing the Active Directory users.
- Select a username to add to the group.
- Click Save to associate the accounts.
Adding a User Group from Active Directory
Once a connection with Active Directory has been established, an additional Import from Active Directory option is added to the Add Group button in the Groups tab.
The following procedure describes how to import a list of users from a group in Active Directory to Sisense.
Users that are added in this way only appear in the Sisense users list after each user logs in to Sisense. In this way, your Sisense license slots are only taken by users who actually log in to Sisense.
To add a user group from Active Directory:
- Click the Admin tab, and search for and select Groups, which is located under User Management.
.png)
- Click the Add Group button and then select the From Active Directory option from the menu.
- In the Search Active Directory Group field start typing in the name of the desired Active
Directory Group. An auto-complete dropdown menu is displayed from which you can select a user group.
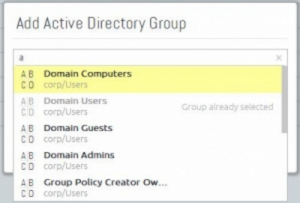
If an Active Directory user group has already been imported into Sisense , the words Group already selected appear next to it, as shown above. You can add multiple Active Directory groups, by selecting one group after another. - Select the default Role for the members of the user group: Viewer or Designer. It will be assigned to new users
from this group, when the users are created. Subsequently, user's role can be changed in the Sisense Users list.
Changes to a group's default role will affect users created after that time, but will not affect existing users. - Click Add.