Managing User Groups
How Do User Groups Work
- When building and sharing dashboards, wherever you can select a user, you can also select a user group. For example, you can share a dashboard with an entire user group at once.
- When you add an additional user to an existing user group, the user receives the role you assigned to them when you created that user
- When users are added in Active Directory to a previously imported Active Directory user group, then those users are automatically added to the corresponding Sisense user group.
- User groups can only contain users. They do not support nested user groups.
- Additional users cannot be added to a user group that was imported from Active Directory.
You can add users to a user group using the following methods:
- Add existing Sisense users to a user group
- Add a user group from Active Directory
Note:
If the environment contains hundreds of groups, you may receive an error message when creating a user group stating that the allotted time for the server to catalog all the users in the group expired before the operation could complete.
Implement the following workaround to avoid this situation:
- In the system's server, navigate to the following folder:
HKEY_LOCAL_MACHINE\System\CurrentControlSet\Services\HTTP\Parameters - Add two new DWORD (32bit) parameters using decimal values:
MaxFieldLength with decimal value 65534.
MaxRequestBytes with decimal value 16777216. - Restart the server for the new settings to take effect.
Accessing User Group Management
You can add, edit and delete user groups, and assign users to them.
To access the user group settings:
- Click Admin and select the Groups tab on the left. A list of the previously defined user groups is displayed. The Origin column displays Sisense or Active Directory to indicate whether the user group was defined in Sisense or imported from Active Directory.
Note:
If no user groups have been defined, the No Groups Found message displays.
Adding a New User Group
You can add a new user group by selecting existing users in Sisense.
See Integrating Active Directory for a description of how to add a user group from Active Directory.
To add a new user group:
-
Click Admin and select the Groups tab on the left.
-
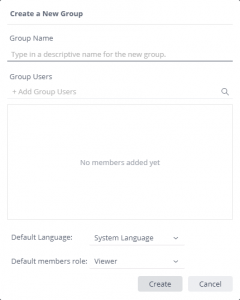
Click Add Group.

-
In a Group Name field, enter the name for this user group.
-
In the Group Users field select each of the users that belong to this group. To add each user, start typing in the user’s name. An auto-complete list is displayed showing the users that already exist in Sisense . Select a username to add to the group.
Note :
If you want, you can leave the group empty and add members to it later.
-
(Optional) The Default Language for a group is the language set by an Administrator for that server. From the Default Language list, you can select another default language for a group. For example, if your server supports groups located in different countries, you can set the language for each group.
-
(Optional) Select the default user role. If you have implemented SSO over SAML, each member of the group is assigned this role when they log in for the first time.
-
(Optional) The Session Inactivity Timeout options are displayed only if you have selected Session Inactivity for your session management. You can use the system default for a group or manually set how many minutes must pass before the group’s users are logged out.
Note:
If the user belongs to multiple groups, the highest timeout settings are applied to that user.
For more information about these settings, see User Sessions.
-
Click Create .
Adding Users to an Existing User Group
Note:
Sisense does not recommend assigning the same user to more than 150 user groups.
To add multiple users to a user group:
-
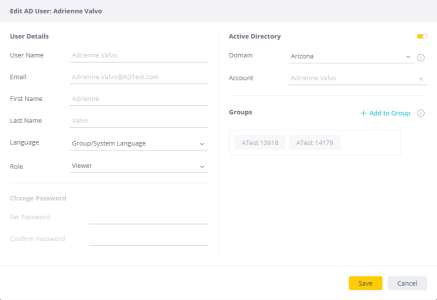
Click Admin and select the Users tab on the left.
-
Select the relevant users and click
 to edit their profile.
-
Click + Add to Group .
-
In Group Users , you can type additional groups to add the user to the groups. An auto-complete list is displayed showing the Sisense and Active Directory groups that already exist in Sisense. Select a group to add the user to it.
-
To remove a user from the Group, hover over the user name in the list and click

-
Click Save .
Editing an Existing User Group
To edit an existing user group:
- Click Admin and select the Groups tab on the left.
- Click
 on the right of the user group’s entry in the list.
Deleting a User Group
When a user group created in Sisense is deleted, its users are not deleted. They remain active users in Sisense.
When a user group imported from Active Directory is deleted, a prompt is displayed asking whether you want to also delete all the users in this user group from Sisense.
To delete an existing user group:
- Click Admin and select the Groups tab on the left.
- Click
 at the right of the user group’s entry in the list.
.r.