Connecting to Snowflake
Note:
This topic describes how to import data into Sisense 's ElastiCube, and how to use Live Connect
Sisense enables easy and quick access to databases, tables and views contained within Snowflake.
To connect to your Snowflake database, you need to provide a connection string that identifies which Snowflake warehouse you are connecting to and that database’s credentials. To create a connection string, see JDBC Driver Connection String .
Note:
You must provide the warehouse name (warehouse=<name>) and database name (db=<name>) in the connection string.
Alternatively, you can provide your connection string and instead of user credentials, you can use Key-Pair credentials for authentication. For more information, see Using Key Pair Authentication.
You can import your data into a Sisense ElastiCube , or connect your data to a Sisense Live model, using Live Connect .
Importing Into a Sisense ElastiCube
To import Snowflake data:
- In the Data page, open an ElastiCube or click
 to create a new ElastiCube.
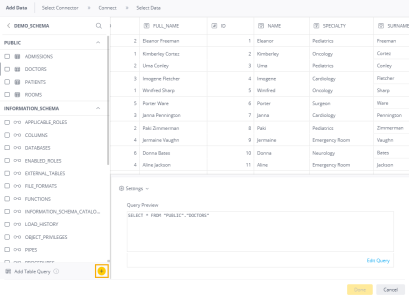
 - From the Tables list, select the relevant table or view you want to work with. You can click
 next to the relevant table or view to see a preview of the data inside it. When you select the table or view, a new option is displayed at the bottom of the list, Add Import Query.
 - In the Model Editor, click
 . The Add Data dialog box is displayed.
In the Add Data dialog box, select Snowflake .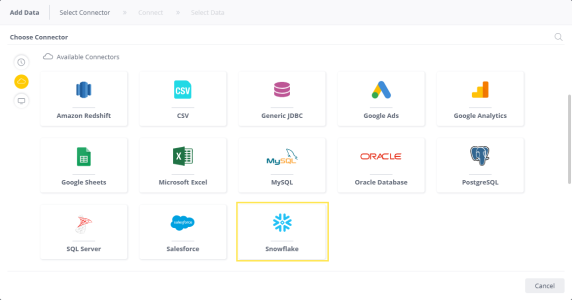
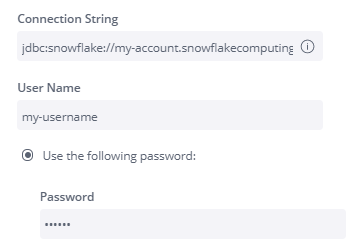
In Connection String , enter your connection string to your Snowflake database. To create a connection string, see JDBC Driver Connection String . For example:jdbc:snowflake://<account_name>.snowflakecomputing.com/?warehouse=<warehouse_name> snowflake://my-account.snowflakecomputing.com/?warehouse=DEMO_WH
In User Name, enter your Snowflake user name.
In Password, enter your Snowflake password.
OR
Select Use Key Pair Authentication, and enter:- Path to Private Key: Where you stored the Private Key on your computer
- Private Key passphrase: The password for your Private Key
- Account: The unique name of your Snowflake account within your organization<

(Optional) In Additional Parameters , enter additional configuration options by appending key-value pairs to the connection string (e.g., Timeout=60;). For a full list of connection string options, click here .
Click Next . All tables and views associated with Snowflake are displayed.

4. (Optional) Click + to customize the data you want to import with SQL. See Importing Data with Custom Queries for more information.
5. After you have selected all the relevant tables, click Done . The tables are added to your schema.
Out-of-Memory Issues
When building an ElastiCube with this connector, you might receive an "out of memory" error.
Connecting Data to a Sisense Live Model
- In the Data page, open a live model or click
 to create a new live model.
 - In the Model Editor, click
 . The Add Data dialog box is displayed.
 - In the Add Data dialog box, select Snowflake .

- In Connection String , enter your connection string to your Snowflake database. To create a connection string, see JDBC Driver Connection String. For example:
jdbc:snowflake://<account_name>.snowflakecomputing.com/?warehouse=<warehouse_name>snowflake://my-account.snowflakecomputing.com/?warehouse=DEMO_WH - In User Name , enter your Snowflake user name.
- In Password, enter your Snowflake password.
ORSelect Use Key Pair Authentication , and enter:
- Path to Private Key: Where you stored the Private Key on your computer
- Private Key passphrase: The password for your Private Key
- Account: The unique name of your Snowflake account within your organization

- (Optional) In Additional Parameters , enter additional configuration options by appending key-value pairs to the connection string (e.g., Timeout=60;). For a full list of connection string options, click here .
- Click Next. All tables and views associated with Snowflake are displayed.
- From the Tables list, select the relevant table or view you want to work with.
- Click Done. The tables are added to your schema.
Limitations
- Snowflake Live does not support the Ranking filter
.r.