Resizing and Mounting a Device for Installation
Last updated: June 10, 2026
| Tier | Deployment |
|
|
The following instructions enable you to change the size of the given storage device and mount it properly, prior to installing Sisense on Linux. The instructions are for Ubuntu (e.g., v20) and may need to be modified for your Linux.
To resize and mount a device:
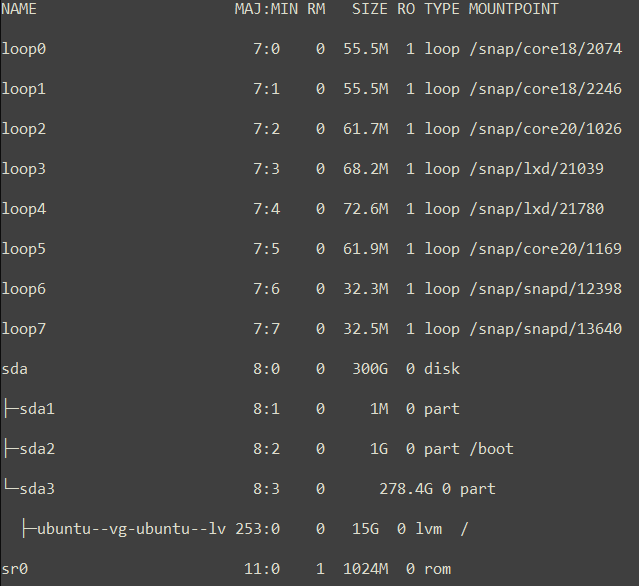
-
Lists information about all available devices.
sudo lsblkExample response:
.png)
Note:
- There is only one disk, and the partition is set to only 15G for the standard Cloudshare template.
- There is no mount at this point.
-
Open the Parted command line tool.
Example reponse:
sudo parted.png)
-
Run the
printcommand to show the size of the disks.Example response:
print.png)
Disk 3 needs to be resized.
-
Resize disk 3 to 300 GB.
Example response:
resizepart 3 300GB
-
Check that the disk has been resized properly.
Example response:
print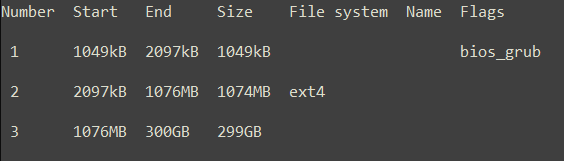
-
Exit Parted.
quitNote:
You may need to update /etc/fstab.
-
Confirm that the resizing worked successfully.
sudo lsblkExample response:
Note:
The SDA 3 device still needs to be resized.
-
Display the physical volume.
Example response:
sudo pvdisplay
-
Resize the specific sda (in this case sda3).
Example response:
sudo pvresize /dev/sda3
-
Confirm that it has been resized to 300GB.
Example response:
sudo pvdisplay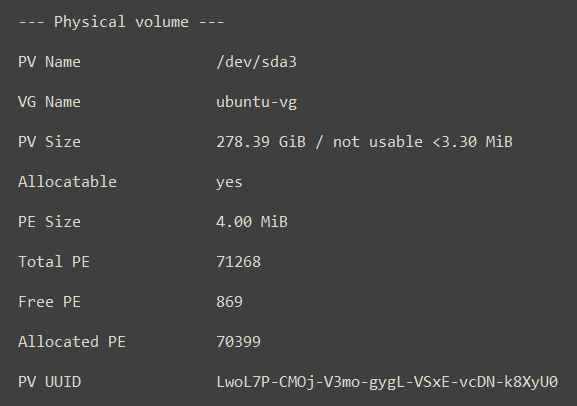
-
Extend the logical volume.
where the ubuntu-vg/ubuntu-lv name comes from the lsblk command above.
sudo lvextend -L +150G ubuntu-vg/ubuntu-lv
Example response:
-
Resize the filesystem.
sudo resize2fs /dev/mapper/ubuntu--vg-ubuntu--lv -
Confirm that sda3 resized correctly.
sudo lsblk
Example response: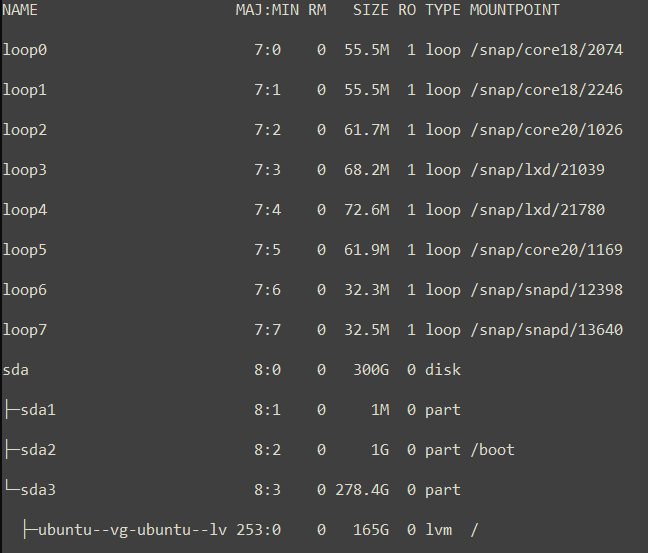
-
Create the logical volume.
Example response:
sudo lvcreate -n sisense ubuntu-vg -L 110G.png)
-
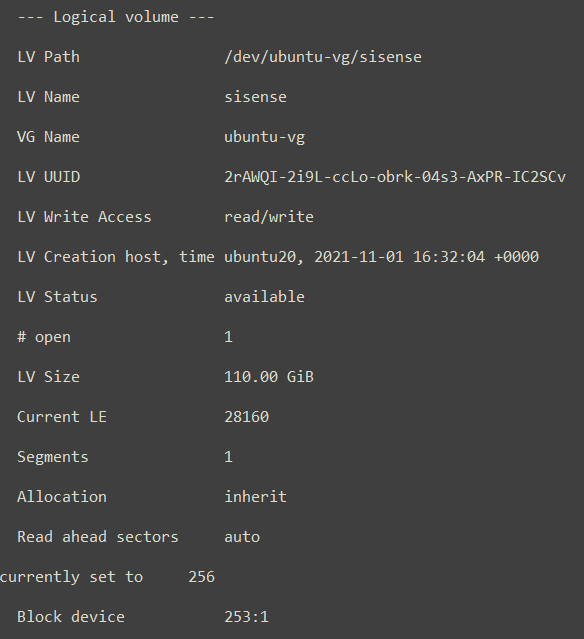
DIsplay the logical volume.
Example response:
sudo lvdisplay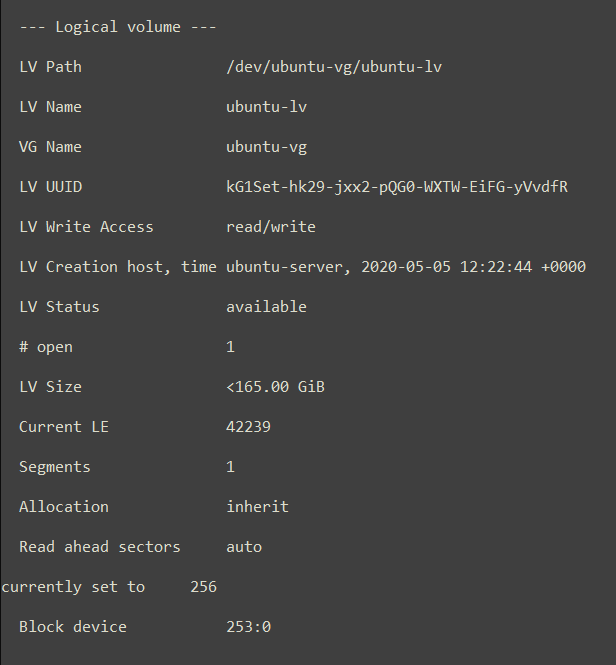
-
Format the logical volume that was just created.
Example response:
sudo mkfs.xfs /dev/ubuntu-vg/sisense
-
Confirm that the format completed successfully.
Example response:
sudo lsblk.png)
-
Create the
sisensedirectory underopt.
sudo mkdir -p /opt/sisense
-
Add the entry to the
/etc/fstabfile.Example response:
cat /etc/fstab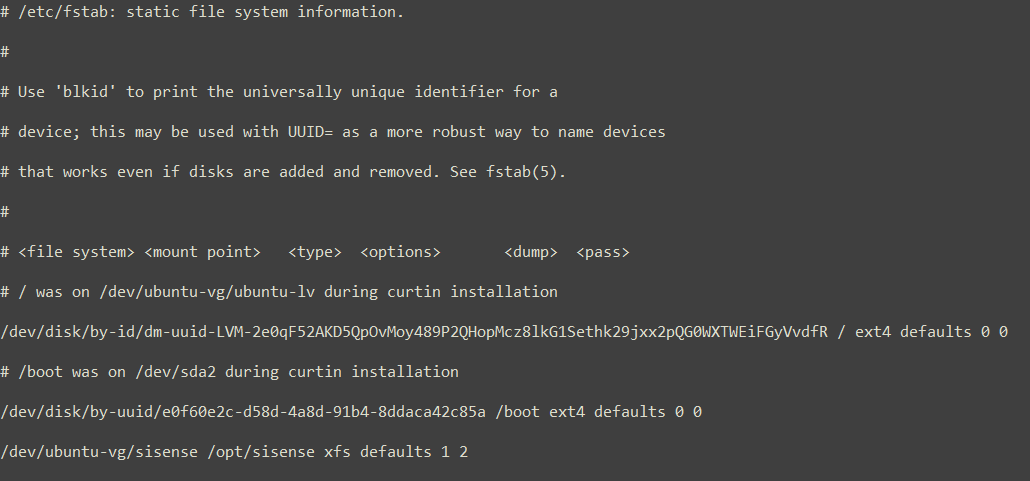
-
Edit the
/etc/fstabfile.
sudo nano /etc/fstab -
In the
/etc/fstabfile, insert the following line.The LV path is entered as the mount: /dev/ubuntu-vg/sisense.
/dev/ubuntu-vg/sisense /opt/sisense xfs defaults 1 2 -
Save the the
/etc/fstabfile. -
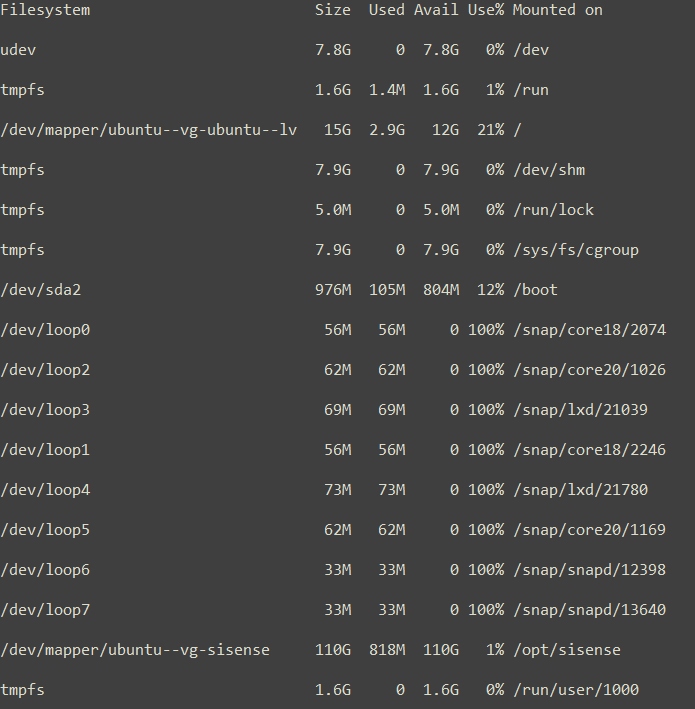
Mount the drive.
sudo mount -a -
Confirm that the device is properly mounted and ready for installation.
Example response:
df -h