Creating Custom Actions
You can create custom actions and embed them into Sisense widgets through BloX widgets.
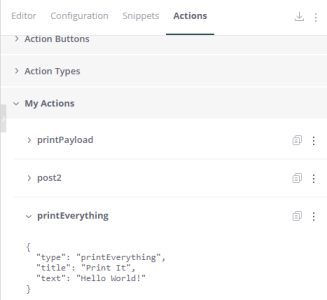
After an action is created, its snippet is added to the My Actions section of the Actions tab, and it can be called, updated or deleted by any Designer working in Sisense.
When creating a custom action, you may use pure JavaScript syntax as well as libraries used in Sisense, such as jQuery, Underscore.js, and Moment.js. The action can access prism and other global variables included in the Sisense JavaScript API.
After saving your action, the action's code goes through Babel, transforming it into ES5 for cross-browser compliance purposes. This transformation is transparent so you see the original syntax any time you choose to edit the action.
Payload
Custom actions can use an argument named payload to access most of their relevant information.
Below are a few important payload properties that any action can access:
Container - The DOM element holding the widget body. This is useful for jQuery selectors.
Data - The action's data property. When you define a new custom action, the best practice is to populate the data property with all the attributes and variables that you want your action to get from the widget. This is also where all input fields' values are contained.
Result - Contains the data panels of the specific widget that triggered the action. For the full widget result set, it is better to access payload.widget.queryResult.
Widget - The BloX widget object. You can use this object to access the widget's structure and result set as well as the parent dashboard and its attributes (filters, other widgets in the dashboard, etc.)
In addition to the above native properties, the payload also contains any property that is added to the action(see the example below).
Creating an Action
To create a custom action:
-
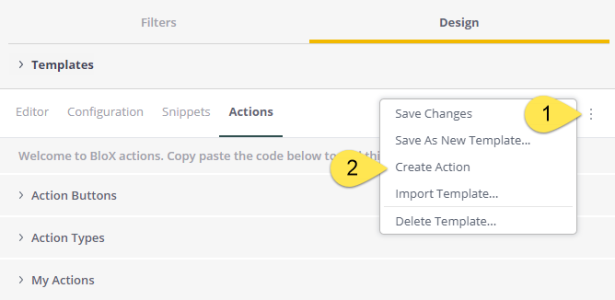
Open the editor's main menu and select Create Action.

The Design Panel displays the JavaScript editor.
-
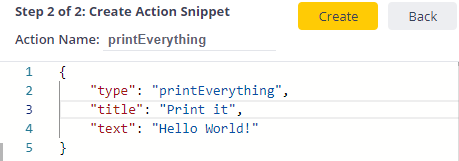
In Action Name, enter a name for your action, preferably camel cased.
-
In the editor, define your action's functionality.
-
Click Next.
-
In the editor, define your action's snippet.

As snippets help Designers add elements and actions to their widgets, it is crucial to make sure that yours includes all of the inputs that your action needs to run properly.
-
Click Create to create your snippet. The action and snippets are saved to the Sisense application database and are visible to all other Designers in the BloX Actions tab.

-
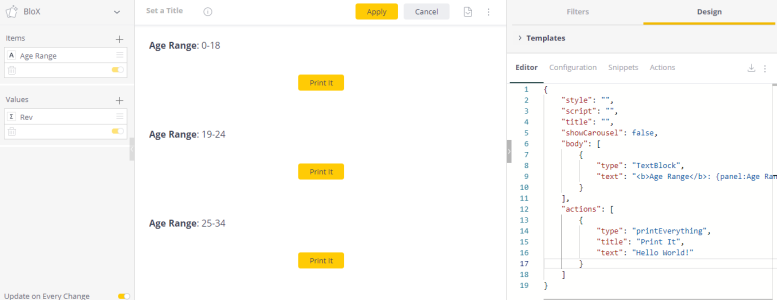
Copy the snippet to the clipboard and paste it to an action container in the BloX editor to test it.
-
If any inputs were included, such as the text attribute, adjust their values to this action button's specific requirements.

-
Click one of the action buttons to trigger it. In the example above, the action's output in the browser's JavaScript console displays the following:

Note:
If a BloX custom action is created on an environment through the BloX design panel, and a dashboard is exported/imported into another environment, the custom action does not transfer as part of the .dash file. It needs to be independently created in each environment.
Editing and Deleting Actions
Any Designer can edit or delete existing custom actions.
To do so, find your action in the My Actions section, click on the menu button on the right, and choose the desired option from the menu.

Tip:
For more information, see BloX: replicating action “send me the report now” on the Sisense Community site.